Monday, May 30, 2011

Mani Kozhakattai / Ammini Kozhukkatai


I don't know whatz happening with blogger. Are some of you guys experiencing the same problem as I am? I am not able to post comments on certain blogs at all.
So my dear friends, please don't be mad at me for not posting comments. I have been reading all your updates, but unable to post comments on some blogs. Hope blogger will fix these issues, if real soon!

 
We were invited by our friend for a special pooja this weekend. I made mani kozhakattai which are basically mini steamed rice dumplings. This is usually made as an evening snack on Ganesha Chathurthi with leftover dough from mornings. Let's get ready!

Get Ready (serves 2):


For the rice dumplings
  • 1 cup rice flour
  • 1 cup water
  • 1 tsp. oil
  • Pinch of salt

For seasoning:

  • 2 tsp. oil
  • 1 tsp. mustard seeds
  • 1 tsp. Urad dal
  • 1 red chili (split)
  • A few curry leaves
  • A pinch of asafetida
  • 1/2 tsp. red chili powder
  • 2 tbsp. grated coconut
  • Salt to taste

Go!

  • In a heavy-bottomed pan, add the water, oil, & pinch of salt. Let it come to a boil.
  • Add the rice flour to the boiling water and mix well without any lumps.
  • Keep the heat on medium and mix it so it forms a ball of dough.
  • Cover with a lid and turn the heat off.
  • Once you are able to handle the dough, apply oil to your palms and make them into small chickpea-sized balls. Use ALL the dough to form balls.
  • Grease an idli stand and steam these rice balls for 10 mins. in a pressure cooker. They will look shiny when they are done.
  • In another pan, add oil. When hot, do the tadka with mustard seeds, Urad dal, red chili, curry leaves, and asafetida.
  • Add the grated coconut, red chili powder, the steamed dumplings, salt to taste and mix well. Let it cook  on low heat for 2 mins.
  • Turn the heat off.
  • Serve hot with some garnished cilantro.


Rice dumplings ready to be steamed!


A perfect evening snack. Enjoy your Memorial day weekend!


Thursday, May 26, 2011

White Chocolate and Cranberry Fudge


Everyone is a bit sceptical when making fudge. It's like making mysore pak, I guess. You have to get the right consistency. The traditional way is use milk, sugar getting it to the right temperature to reduce it.

But, hey when you have the easy way of doing it with Condensed milk, why fret over a tedious process.
The first time I tried to make chocolate fudge, was a failure. The taste was good, but it never set.

Tried again this time and it came out perfect. My husband and kids love white chocolate fudge and I made this specially for them. To jazz it a little, I added some pistachios and cranberries.

This is perfect dish to take for parties or as a teacher appreciation gift.

Here is the recipe:

Get ready:

  • 1 14 oz. can fat free condensed milk
  • 2 x 12 oz. bag white chocolate morsels
  • 1 tsp. vanilla extrtact
  • A pinch of salt
  • 1/2 cup chopped pistachios
  • 1/2 cranberries (dried)

Go!

  • Line a baking/pyrex pan with foil or parchment paper so that the paper hangs out from the sides
  • On medium heat, heat the condensed milk
  • Add the chocolate chips and stir till the chocolate melts and combines with the condensed milk
  • Turn the heat off
  • Add the vanilla extract, salt, nuts, and cranberries and mix well
  • Pour into the foil lined baking pan and smoothen the top
  • Refrigerate  for 2-3 hrs. for it to set
  • Lift the foil and cut into pieces of desired shape
keep them in the refridgerator covered.


Enjoy these sweet babies anytime!

Sunday, May 22, 2011

Zucchini Rice

WHAT??...........

 
Zucchini and rice!

 
That was my first reaction to it too! But I was brave enough to try it and it proved I was wrong.

 
A very simple and yummy rice dish. My kids loved it too!


We were in a rush this saturday. Kids had swim lesson in the morning and hubby had to catch a flight at noon. It is ridiculous that the airline companies charge for your first check in baggage and don't give yoyu anything on board. ( except for Jet Blue). I made this quick one pot meal. I had bookmarked this recipe some time ago and wanted to give it a shot!

 
So people, don't think, get your zucchini and a grater and let's start cooking! The rice can be cooked in a pan or a cooker. i used pressure cooker and reduced the water. use 2 cups of water if using a sauce pan to cook the whole thing.


Get Ready: ( serves 2-3)
  • 1 cup basmati rice
  • 1&1/2 cup water
  • 1 cup grated zucchini with skin
  • 1/2 cup peas
  • 1 tsp lime juice
  • 1" cinnamon stick
  • 1 bay leaf
  • 1 tsp mustard seeds
  • 1 tsp jeera
  • 2 red chillies
  • 1 tsp cashew broken into pieces
  • salt to taste
  • 1 tbsp oil
  • 1 tsp butter
Go:

 
  • Soak basmati rice in water or 20 mins, drain and keep aside.
  • In a pressure cooker ( directly) add the oil and butter. once hot add the jeera, cinnamon, bay leaf, red chillies and cashews..
  • When they all sizzle, add the rice and fry for 5 mins.
  • Add the zucchini, 1& 1/2 cups water, peas,lemon juice, salt to taste and mix well.
  • Close the cooker and cook for 1-2 whistles.
  • Take it iff the heat.
  • Once the pressure is released, fluff the rice, garnish with cilantro.
  • Serve hot with any curry, pickle or raita.

 
I served them with home made potato fries!

Friday, May 20, 2011

Chole Paalak/ Chick peas & Spinach curry

Living in Virginia feels like living in the Pacific North West! It rains almost everyday here. It's good for the plants etc etc.. but I am so done with this rain. I want some sunshine, real bad!

Made this chole with left over spinach from my paalak paneer. It was super good and tasted awesome with chapathi's.

Chole Paalak ( serves 2)

Get ready:
  • 1/2 cup  cooked chick peas or 1 15 oz can
  • 3 cups chopped spinach
  • 3 medium tomatoes
  • 1 green chilli
  • 1 inch piece ginger
  • 1 tsp cumin seeds/ jeera
  • 1/4 tsp asafetida
  • 1/2 tsp cumin powder
  • 1/2 tsp coriander powder
  • 1/4 tsp turmeric powder
  • 2/3 cup water
  • 2 tsp oil
  • salt to taste

Go:
  • In a blender puree tomato, ginger and green chilli, set aside
  • In a pan, add oil and once hot crackle the jeera and asafetida.
  • Add the tomato puree, turmeric powder,coriander, cumin powder, a little salt. cover and cook for 5- 10 mins.
  • add the chopped spinach, 2/3 cup water. cover and cook till spinach is soft for about 5 mins. add salt to taste.
  • add chick peas, salt to taste and mix well.
  • If too thick add little water till you get the right gravy consitency.
  • mash a few chick peas with in the pot to give thickness.
  • Add garam masala ( optional) and let it come to a boil.
  • Turn heat off and serve with chapathi or poori's.
 Chatpata chole paalak is ready!

Monday, May 16, 2011

Chilli Paneer

Spring  is for showers, flowers and Pollen!

The allergy season is on and people who suffer from allergy will tell you how hard it tis to have stuffy noses and itchy eyes! Just some tips from me to keep your allergies under check,

Keep your windows closed, pollen counts are high in the morning between 5- 10 am.
keep A/C on, vaccum the floors/ carpet frequently.
If your child has stuffed animals in her bed, make sure you wash them regularly. More than pollen, house dust mite is the common allergen.
Try over the counter medications for allergy. If not improving consult your doctor.

Now, let's get out tongue tickling chilli paneer dish!


Chili paneer is a fiesty indo chinese dish made with mixed peppers and paneer. It can be served as dry or a gravy based curry. the measurements I used gave medium spicy curry, but one could always increase the spices to suit your taste. Paneer is usually deep fried and added to the dish. I shallow fried them without any corn flour and still had a wonderful taste.


Get Ready: ( serves 2-3)

  • 1 cup paneer small dice
  • 1 cup mixed peppers (I used red and orange)
  • 1 tsp ginger garlic paste
  • 2 spring onion chopped green and white separately
  • 1 tomato chopped
  • 1 tsp cumin seeds
  •  1 tsp dhania powder/ coriander powder
  • 1 tsp redchilli powder
  • 1 tbsp tomato ketchup
  • 1 tsp soy sauce
  •  1 tsp chilli sauce
  • 3 tbsp oil
  • salt to taste
  •  cilantro to garnish
Go:

  • In a pan, add 1 tbsp oil. when hot add the paneer and shallow fry till they are golden crispy on the outside. set aside.
  • In the same pan, add the remaining oil. once hot add the cumin seeds and let it crackle.
  • Add the white part of chopped spring onions, fry for few mins
  • add the ginger garlic paste and fry till aromatic.
  • add the coriander powder, red chilli powder and saute for a minute
  •  add the tomatoes and cook till mushy.
  • add the peppers, a little salt and fry on medium to high heat till they are soft yet crunchy.
  • add the ketchup, soy sauce, chilli sauce and salt to taste.
  • Mix everything well and let it cook for a minute or two.
  • Add the paneer cubes and toss everything well.
  • Tyrn the heat off.
  • garnish with cilantro and green of spring onions.
  • serve hot with chapathis.

Saturday, May 14, 2011

Strawberry Muffins


I've never used cake flour to bake. i had picked up a box of cake flor sometime back. Also had some strawberries shrivelling inside the fridge. Googled and found that cake flour gives a much lighter texture.
Combined the above 2 and made these yummy muffins. They were so fluffy, almost like the blueberry muffins you get in Dunkin donuts. i used 3/4 th sugar, it was little sweet, you can always reduce the sweetness if you want to. Adding nuts might be another good idea. my kids don'y like nuts in their muffins and I skipped it. They were soft and moist the next day as well.
 
Get Ready: (Yields 7 muffins)

  • 1 cup cake flour
  • 1/2 cup coarsely pureed stawberries
  • 1 tsp orange zest
  • 1/2 tsp vanilla extract
  • 1 egg
  • 3/4 cup sugar
  • 1/3 cup milk
  • 1/4 stick butter melted
  • 1/2 tbsp sourcream or yogurt
  • 1/2 tsp baking powder
  •  salt a pinch

Go:

  • Preheat oven to 350 F
  • Line muffin tin with liners or spray.
  • Cream melted butter and sugar till smooth.
  • Add egg, and all wet ingredients.
  • Mix well till all are well incorportaed. I used an electric mixer, medium speed for 3 mins.
  • add the flour, stawberry puree and fold.
  • Do not over mix.
  • fill 3/4 of the nuffin tin and bake till a tooth pick comes out clean.
Enjoy for breakfast or any time as a snack!

Tuesday, May 10, 2011

Paalak Paneer


Palak paneer is pretty popular in the western world, next to Chicken tikka masala and channa masala. One could compare it with creamed spinach minus the aromatic spices, right!
This is a simple and very nutritious curry to go well with roti, naan or rice. I am sure ebery household have their way of doing this. some may fry the paneer, some not etc etc..

I did not deep fry my paneer and used fresh spinach rather than frozen. Addig cream gives very rich consistency to the gravy, but i replaced it with whole milk. Evoparated milk works fine too.

Get ready ( serves 2)

  • 1/2 box of fresh baby spinach leaves
  • 2 large tomatoes pureed
  • 1 medium onion , mushed up in food processor or blender
  • 1 tsp ginger garlic paste
  • 2 tsp red chilli powder
  • 1 tsp coriander powder
  • 1 tsp garam masala
  • 1/2 cup paneer cubed
  • 1 tbsp oil
  • 1 tsp cumin seeds
  • 1 "' cinnamon stick
  • 1 clove
  • 2 green cardamom
  • 2-3 tbsp whole milk
  • salt to taste.

Go:

  • In a large sauce pan, add the spinach leaves, a little water to wet them. let it  boil till the spinach leaves wilts.
  • turn the heat off. remove the spinach leaves without water and puree them. keep aside.
  • In a pan, add oil and let the cumin seeds,cinnamon, clove nd cardamom and let it sizzle.
  • Add the onion and fry till golden.
  • add the ginger garlic paste and fry till the raw smell goes.
  • Add the coriander powder, garam masala, redchilli powder and fry till raw smell disapperas for a minute.
  • add the tomato puree, salt to taste. let it come to a boil
  • Cover, and let it cook for 5 -10 mins.
  • Add the spinach puree and check for salt and spices.
  • let it come to a boil uncovered
  • Add the paneer cubes and gently fold them into the gravy.
  • let it cook for a minute or so uncovered
  • Add 2 tbsp of milk and turn the heat off.

Serve hot with roti, chapathi or rice.

Enjoy this green goodness!

Saturday, May 7, 2011

2 min Chocolate cake in a mug, Seriously!

2 min Chocolate cake in a mug, Seriously! No kidding!

The Moment I saw this cake here and  there , I was determined to make it.

I liked the idea of adding coffee and used the recipe from not quite nigella.
It looked simple, no fuss and yet a tasty treat. Adding instant coffee bring out a great chocolatey flavor to this cake. The cooking time varies slightly with the power of your microwave. I stringly recommend the initial cooking for 1 min and then increase by 30 seconds as needed. I cooked mine for 1 min and 20 seconds.


Get Ready: ( serves 2 )
  • 1 Mug
  • 4 tbsp  all purpose flour
  • 5 tbsp sugar
  • 2 tbsp cocoa powder
  • ¼ tsp baking powder
  • pinch of salt.
  • ½ tsp instant coffee powder (optional)
  • 3 tbsp chocolate chips ( optional)
  • 3 tbsp milk
  • 3 tbsp oil
  • A dash of vanilla
  • 1 large egg


 Go:
  • In a separate bowl, whisk the eggs, milk, oil well.
  • Add the dry ingredients ( flour, sugar, cocoa powder, salt, baking powder, instant coffee powder) and incorporate well.
  • Add chocolate chips, vanilla extract.
  • Grease 2 coffee mugs with cooking spray.
  • Divide the batter into 2 coffee mugs.
  • Microwave on high for 1 min. the cake will rise, but will not spill if you use a big mug.
  • Cook for additional 30 secs if you need a softer cake, or just 10 secs, if you want a gooey middle.
  • Serve warm with vanilla, or coffee ice cream or whipped cream.
Enjoy your Mother's day with this super simple chocolate cake in a mug!

PS: Ask your DH and children to read this post as they can make it in a jiffy too!

This recipe is sure a keeper!

Wednesday, May 4, 2011

Butternut Squash Raita


ButterNut Squash (BNS) is a frequent visitor in my kitchen. I use them for sambar, curry, Curried butternut squash soup and this yummy raita. As any other raita, there is yogurt and what makes it unique is using raw mustard seeds with coconut. I learnt this recipe years ago from my aunt. It goes well with rotis. or any spicy pulao or vathakuzhambu.

The only pain in cooking butternut squash is peeling the lard skin. Life is made easier for those who don't want to do this by selling diced BNS.
I served it with rice and the left overs, was used as a spread on my tortilla rollups as lunch.

Get Ready:

  • 1 cup diced BNS, boiled and mashed
  • 1/2 tsp mustard seeds
  • 1 tbsp shredded coconut
  • 1 tsp chopped ginger
  • 2-3 green chillies ( more if you like it hot)
  • salt to taste
  • 1/4 - 1/2 cup plain yogurt.

Go:

  • Grind mustard seeds, green chilli, ginger and coconut with little water.
  • add it to the mashed BNS
  • add yogurt, salt to taste and mix well.
  • Doesn't need any tadka.

Serve chilled.

Sending this to kiranjay and Priya's  cooking with mustard seeds event.

Enjoy!

Sunday, May 1, 2011

No Knead Bread Rolls for Maitri


Many of you might have heard about Maitri  an awesome event for all bloggers in USA. This is a brain child of Priya and Reshmi. I was so excited to be a part of this. I was paired with Divya of divya-dilse and she sent me an ingredient with which I had to cook. Pretty cool right! For more information or if you would like to be a part of maitri check out..here

 
Divya was so sweet to send me a card and cute potato peeler. She sent me Flax seeds to be included in the cooking.


 Flax seeds are rich in Omega 3 and help to lower cholesterol. I had book marhed a no knead bread roll from here.

 
I included flax seeds in the rolls and they were super soft and delicious too! I quarterd the recipe and it gave me rolls. The rolls get cooked in 20 mins ,but the hardest aprt is the waiting for 2-3 hrs! yes, you just want to see the dough rise and want to get your mouth into it! For the original recipe check PW!


Get Ready (yields 11 rolls)

  • 1 cup milk
  • 1/4 cup sugar
  • 1/4 cup oil
  • 2 and 2 tbsp flour
  • 2 tbsp flax seeds coarsely ground
  • 1 and 1/4 tsp yeast
  • 1/4 tsp baking powder
  • 1/4 tsp baking soda
  • 1/2 tsp salt


Go:

  • Pour 1 cup of milk into a pan. add sugar and oil and scald the milk.  let it bubble at the sides,but not boil.
  • Turn the heat off.
  • Wait to cool well, so that the when you touch the pan with the palm of your hand it feels comfortable. you don't want to kill theyeast if the milk mixture is very hot.
  • Once cooled, add 1 cup flour and 1 & 1/4 tsp yeast.
  • Mix well with a spoon. once the flour and yeast are well incorporated,add another cup of flour.
  • Stir well and allow it to sit covered with a tea towel for 1 hour.
  • The dough should double by now.
  • After an hour add the 2 tbsp of flour,baking powder, soda and salt and mix well.
  • ( it's ok, to kead if you want to!)
  • Butter any baking dish of your choice. I used a 9 " ci rcular cake pan.
  • Form balls of desired size from the dough, smoothen it and arrange in the baking pan.
  • Once you are done with all the dough, cover and let it sit in a warm place for 2 hrs.
  • Bake in preheated 400 F oven for 17 -25 mins till golden on top.
  • Rub with a little butter to get that extra shine.


Look how soft and fluffy the inside is! Thanks Priya, Reshmi and Divya, it was fun and totally enjoyed this event!

Tuesday, April 26, 2011

Channa Dal curry/ Kadalai paruppu curry


Channa dal  has a low glycemic index and we all know foods with low glycemic index is good for us. It is basically split and polished garbanzo beans.
It is used widely in the south indian cuisine for vadai, adai, cootus, spice powders and thogayals. I make dal with this, which is some time a nice change from the usual moong or toor dal.

This is a basic recipe and you can always add or take out any ingredient you want too. I served it with chapathis and rice and we all enjoyed it.

Get Ready ; (serves 2)

  • 1/3 cup channa dal
  • 2/3 cup water + plus more
  • 1 small onion chopped
  • 1 green chilli slit
  • 1 tsp chopped ginger
  • 1 clove garlic chopped ( optional)
  • 1 tsp garam masala
  • 1/2 tsp tamarind concentrate
  • 1 tbsp grated coconut
  • salt to taste
  • 1 tbsp oil
  • 1 tsp cumin seeds
  • 1 tsp mustard seeds
  • chopped cilantro
  • 1/2 tsp sugar ( optional)


Go:

  • Wash and soak the channa dal for 20 mins.
  • Heat oil ina pressure cooker.
  • Once hot add the mustard seed, cumin and let them pop.
  • Add the garlic and fry till golden.
  • add the onions, green chillies, ginger and saute till the onions are golden.
  • Add the dal, 2/3 cup water, tamarind paste, coconut, salt to taste and mix well.
  • Pressure cook for 3 whistle, simmer for 5 mins and turn the heat off
  • Release the pressure. If the dal is a little runny, let it boil till thickened to desired consistency.
  • Add 1/2 tsp sugar, cilantro.

Serve hot with rice, rotis, chapthis or parathas.
Simple satisfying meal on a busy weekday is ready!

Tuesday, April 19, 2011

Puff Pastry Swirls: Paneer and Nutella!


Puff Pastry sheets are one of the best ready made baking items that you could get here! Saw the recipe for spinach swirls on the back of the box, but did not care much to do it.

 
I used paneer, grated carrots, onion for a savory one and nutella, chopped pistachios for a sweet one!
It is unbelievebly easy to make, although the final product gives an impression that you slogged!
Very easy afterschool/ tea time snack that could be prepared in no time and satisfy hungry kids and adults.

 
You use any cheese you want and add any fillings of your choice.

 
Thaw the puff pastry sheets on the counter for 40 mins before you start. It comes as 2 sheets in a box, I used one sheet , paneer filling on one side and nutella on the other half.


Get ready: ( makes 10 swirls)

  • Puff pastry sheet
  • ketchup
  • melted butter to brush


 For the paneer filling:

  • 2 tbsp finely chopped onion
  • 1 tbsp grated carrot
  • 2 tbsp crumbled paneer
  • 2 tbsp chopped cilantro
  • 1/8 tsp turmeric powder
  • 1/2 tsp coriander powder
  • 1 tsp red chilli powder
  •  salt to taste
  • 1 tsp oil
To make the paneer filling:

Add 1 tsp oil in a pan.
add the onions and fry till golden
add the carrots and saute for few mins.
add the crumbled paneer, all the powders, salt to taste.
cook for few mins and turn the heat off.
set aside

To assemble the paneer swirls:


  • Pre heat oven to 400F
  • Linea baking sheet with foil and spray with cooking spray.
  • Dust a working surface with flour.
  • Open the puff pastry sheet and even it out with a dusted rolling pin.
  • Spread ketchup as a thin layer on the pastry sheet leaving about 1/2 inch on all four sides.


  • add the paneer filling and spread it evenly on the ketchup.


  • from the side closer to you roll it tight like a jelly roll.
  • seal the edges with a little water. this is the seam side
  • Turn the seam side down and cut them into 1/2 inch think slices.
  • arrange them on the baking sheet


  • Brush the swirls with either milk or egg wash ( 1 beaten egg with 1 tbsp of water) to get a golden color after baking.


For the Nutella swirls:

  • Nutella
  • chopped pistachios

  • Brush the pastry sheet with melted butter
  • spread nutella on top and leave 1/2 inch on all 4 sides.
  • add any chopped nuts like macadamia, walnuts on top of the nutella
  • Roll in the same away as desribed above and seal.
  • Cut into 1/2 inch slices
  • arrange on baking sheet
  • do the milk/ egg wash
  • Bake all of them for 12- 15 mins till they are golden

Allow to cool for few mins
Serve with any chutney or ketchup

Enjoy with a cup of chai!

Saturday, April 16, 2011

Kerala Paal Payasam/


Kerala paal payasam is one of a kind. It has basic ingredients milk, rice and sugar, but tastes like heaven. If you haven't tasted one, you should try this soon! Paal payasm is equivalent to the rice pudding here and is served during special feasts or poojas like baghavath sevai ( pooja for goddess durga/ bhagavathy).

The payasam has a slight pinkish color from the reduction of the milk and red rice( chomanantha ari) ,exclusive of kerala. i had some red rice brought from India which I used. One could totally replace it with basmati rice too!
Another method is to do the payasam in the pressure cooker, which gives a pink color, but some how I doesn't give the same flavor. I cooked mine in the bottom of a pressure cooker (without lid).Stir constantly taking care not to burn the milk. the aim is to reduce the milk to half while the rice gets cooked in the milk. Once the milk is reduced your desired consistency, add the sugar. Adding sugar earlier will not let the rice cook well.

So you need a little patience and that is totally worth all the effort. You don't need any garnishing for this payasam.

Here is our family recipe!

The rule of thumb is 1 fistful of rice for a litre ( 4 cups) of milk. I measured my fistful of rice which was 1 & 1/2 tbsp.

Get Ready: (serves 2-3)

3 cups 2% milk
1, 5oz can evoparated milk
1/2 cup sugar
1 and 1/2 tbsp rice

Go:
  • Add 3 cups of milk to a heavy bottomed pan
  • wash the rice and add it to the milk.
  • let it come to a boil and then reduce the heat to medium.
  •  keep stirring intermittently as the milk will boil and foam up. stirring will prevent from spilling over.
  • When the rice is half done, add the evoparated milk.
  • Once the rice cooked well and milk reduces  add the sugar.
  • Let it boil for a few mins and take it off fro mthe heat.
  • Serve hot or cold!

The traditional way of eating pal payasm in kerala is with Puran poli!


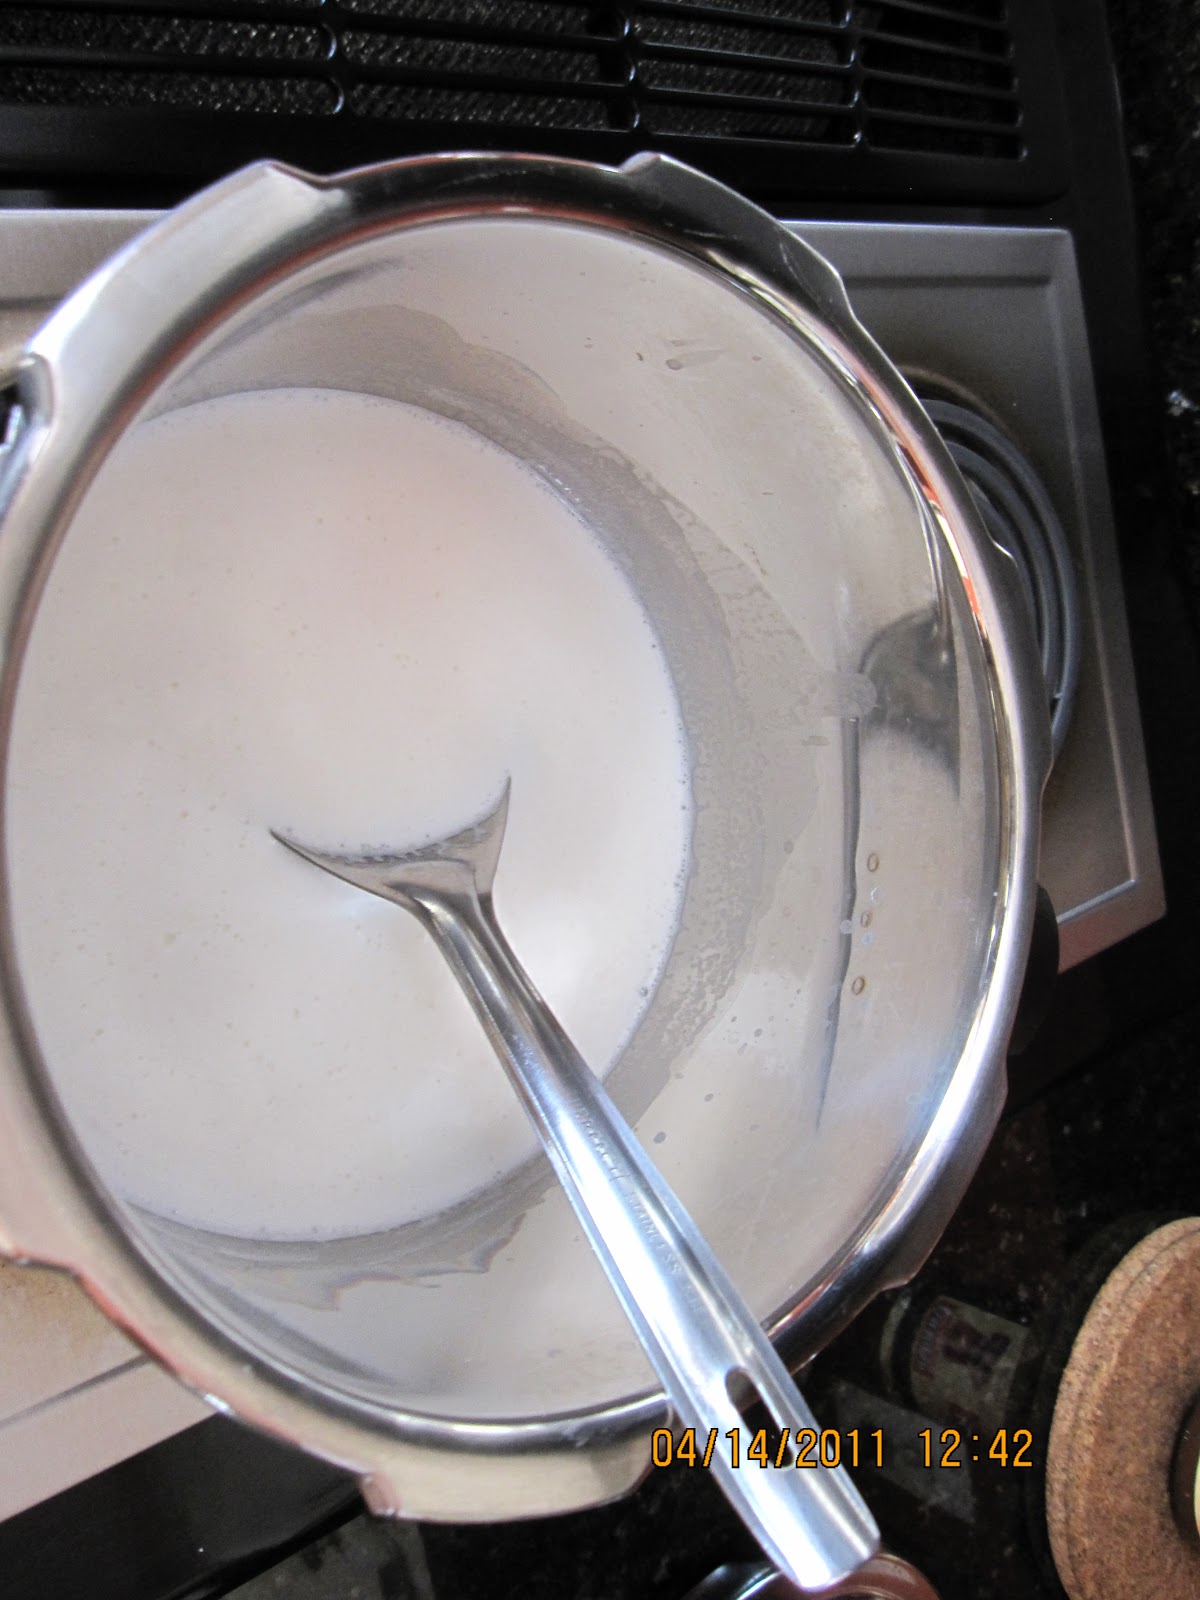
Milk before reduction.

Milk after reduction

Payasam ready !

Monday, April 11, 2011

Desi Lasagna


We had a great vacation in Miami, florida and came back home today. I will post some infor on travel to miami beach soon. I made this lasagna over the weekend before travelling and wanted to share it with you all.

I have been making this version of lasagna for the past few years. My first taste of lasagna was from my cousin Rama in UK. since then, I have tried many versions and finally nailed it to this one. I have spiked it with a lot of indian ingredients, trust me I did not add sambar powder here...!

A true italian may laugh at this version, but hey, this works out best for me and my family.

Get Ready: ( serves 3-4)

  • 1 medium onion
  • 1 clove of garlic crushed
  • 1 zucchini diced
  • 1/2 red pepper diced
  • 1 carrot diced
  • one handful of peas
  • 1/4 egg plant diced
  • 1 tsp ginger garlic paste
  • 1 or 1/2 jalapeno pepper slit
  • 1/2 jar marinara sauce ( i used a large bottle)
  • 1/2 cup ricotta cheese
  • 1/2 cup cilantro
  • pepper powder to taste
  • salt to taste
  • 6 no cook lasagna noodles
  • 2 tbsp oilve oil
  • Parmesan and shredded mozzarella cheese
  • 1 tbsp of butter

Go:

  • In a large sauce pan, add oilve oil.
  • Once hot add the onions and fry till tranaslucent.
  • Add the garlic, ginger garlic paste, jalapeno and fry till aromatic.
  • Add all the diced vegetables, salt to taste and saute for a few minutes till they are soft, still crunchy.
  • Add the marinara sauce, salt to taste and cook till everything comes to a boil.
  • Turn the heat off and set aside.
  • add cilantro to the ricotta cheese and mix well till it's well incorporated. add pepper powder according to taste and keep the cheese mixture aside.
  • Eventhough the lasagna noodles are no cook, I cook them them for a few mins. you can skip this step if you want to.
  • Cook lasagna noodles for a few mins till they are aldente.  lift them up care fully, brush with oilve oil and keep them on a plate.
  • Preheat oven to 350 F
  • Grease a 2 qt baking dish with non stick spray
  • add a layer of tomato veggie sauce at the bottom.
  • Arrange the lasagna noodle on top of the sauce.
  • Spread the cheese mixture on top of the noodles.
  • repeat layers of noodles, sauce and cheese and fill up to the top.
  • Sprinkle both cheeses on the top layer.
  • add pieces of butter on top of the cheese to give a nice golden crust.


  • Cover the baking dish with foil and bake for 40 -45 mins.
  • Check around 30 -35 mins to see if the cheese is bubbling. then remove foil and bake for another 10 mins to get the golden crusty top.
  • let it sit in the oven for 20 mins before you serve.
The steps may seem a lot of work, but actually very easy to put together.
Any left overs ( if present) taste awesome for the next day!.


I am sending this for Fusion recipes  guest hosted by priyasnowserving and  Pari's foodelicious
I would also like to thank priya for passing a cute  namesake award! Love ya!


Jay of tasty appetite was so sweet to share two awards with me. I am so humbled by all your gesture and would like to give you a big hug!


I would like to pass these awards to all my friends, so please fell free to pick up!

Enjoy your lasagna!

Sunday, April 3, 2011

Jeera Aloo/ potatoes with cumin


 The talk of the town is about our victory in world cup! What an amazing match that was! I am so proud to be an Indian and wanted to thank every single member of our cricket team to make this success happen after 28 years!

I stumbled upon this easy potato recipe from master chef Sanjeev Kappor's website.I made this today and it was simple, comforting and really good.

Baby potatoes sauted with lots of cumin/ jeera and crushed coriander seeds bursts with flaovors. The Amchur power gives a little tanginess and makes this curry irresistable for any body! i happen to find only red baby potatoes in the market, but you can use any size or type.

Here we go with the good stuff!

Get Ready: ( serves 2 )

Red baby potatoes 14
2 tsp Jeera/ cumin
2 tsp coriander  seed/ dhaniya cushed ( without roasting)
1 tsp cumin powder
1 tsp red chilli powder
1/4 tsp turmeric powder
1 tsp amchur powder
A pinch Hing/ asafetida
salt to taste
Oil 2 tbsp
1 tbsp chopped cilantro

Go:

  • Wash and cook the potatoes till soft. I did not care to peel the skin. if you pressure cook, cook for just 1-2 whistles. set aside
  • Once potatoes are cooled, cut them in half.
  • In a pan add oil.
  • Once oil is  hot add the cumin and let it sizzle.
  • Then add the crushed dhaniya, turmeric, cumin, red chilli powder, amchur powder, hing,
  • Saute till a nice aroma comes and raw smell disappears from the spices.
  • Add the potatoes, salt to taste and toss them around till all the spices coat the potatoes.
  • Reduce the heat and cook uncovered for 5- 10 mins.
  • Turn heat off, garnish with cilantro and enjoy!

Goes well as a side with rice or a snack by itself!

Thursday, March 31, 2011

Blueberry Muffins


I am extremely sorry, my fellow bloggers if I have not been regularly visiting your blog. Things have been very busy at work and home. Barely having time to do anything other than the mundane stuff.

I finally had a day off today and wanted to share this goody with you all!
Why pay big bucks for breakfast muffins when you can make some at home. Now that berries are in season, make use of them to whip up this real easy blueberry muffins.

The muffins look a little pale coz I used white granulated sugar instead of brown. But you can replace with whole wheat flour or brown sugar for a darker color.
I personaly find using whole wheat flour gives more denser muffins.I don't know if it's just my poor technique or something else?
Anyways, enough said, lets get to those muffins!


Get Ready:  (Yields 6 muffins)

  • 3 tbsp unsalted butter at room temperature
  • 1/2 cup sugar
  • 1 large egg
  • 1/4 cup sour cream
  • dash of cinnamon
  • 1/2 tsp pure vanilla extract
  • 1/4 tsp lemon zest
  • 1/2 cup Self rising flour + 2 tbsp ( you can use all purpose flour, but make sure to use baking powder with it)
  • 1/2 cup bluberries

Go:
  • Preheat oven to 350F. line muffin pan with paper cups or spray with non stick spray.
  • Mix the blueberries with a tablespoon of flour and set aside. this will help them not to sink at the bottom.
  • Cream, butter and sugar well.
  • Add egg and whisk well till incorporated.
  • Add sour cream, vanilla extract, lemon zest,cinnamon and mix.
  • Fold the flour and blueberries. Remember not to over mix as it will give tough muffins.
  • Fill 3/4 of the muffin well with the batter.
  • bake for 20 -25 mins or till the tooth pick inserted comes out clean.
Let it cool and enjoy.

The blueberries burst inside the muffins and the lemon zest just boosts the flavor significantly!

Enjoy!

Thursday, March 24, 2011

Popeye Pasta


I am so glad that Spring is finally here! The blossoming trees and the bright colored daffodils and bulbs bring such a great treat to your eyes. Spring and fall are my favorite seasons.

We all have seen popeye, dunking all that spinach and becoming strong! don't you want your munchkins to get the goodness of fibre, iron and vitamins from spinach?
 No worries, you are at the right place! I made pasta with some left over spinach and some red kidney beans and it was absolutely delicious. My 2 year old gobbled a lot and i was pretty pleases as she got a good serving of her greens! You can throw in any beans you want, I had some red kidney beans and I made use of it. Replace elbow macaroni to any of your favorite pastas like fusili, penne or etc...

Get Ready: (serves 2)

  • 2 cup thinly chopped baby spinach
  • 3 cloves garlic chopped
  • 2 hand full Cherry tomatoes hlaved
  • 1/2 onion thinly chopped
  • 1/2 cup red kidney beans ( i used canned, thoroughly rinsed)
  • 1 cup elbow pasta uncooked
  • 2 tbsp olive oil
  • salt to taste
  • red chilli flakes to taste.
Go:

  • Cook pasta,drain & reserve about 1/3 cup pasta water.
  • Add 1 tbsp Olive oil ina pan. add the onion and garlic and saute till translucent.
  • add the chopped spinach and cook for a few mins till it has  wilted
  • throw in the cherry tomato halves.
  • add the kidney beans and salt to taste.
  • saute for few mins
  • Add the cooked pasta and couple of tbspoons of pasta water. add more pasta water if needed
  • add 1 tbsp of olive oil and toss everything well. turn the heat off.
  • Serve with some chilli flakes for an extra kick.

I did not have chilli flakes, so i dry roasted one red chilli, powdered it and added on top of my pasta.Oh.. spicy!!!
 I am not a big cheese person, but if you wish add some grated parmesan/ romano cheese!

Packed this for school lunch and my son brought the container empty!

Also wanted to share these beautiful blooms from my back yard!

Sunday, March 20, 2011

Ghee Rice


Ghee rice or nei choru is a speciality from the malabar region of Kerala. It's generally served with a spicy kurma, mainly non veg. I made this yesterday and served with vegetable and tomato kurma. The name is self explanatory that it uses ghee, but i did some swap with vegetable oil instead of all ghee.
I used my time trusted pressure cooker to make this rice, but is usually made on stove top. I had some friends over and we all thoroughly enjoyed this rice dish.

 
Get Ready:

 
  • 3 cups basmati rice
  • 4 1/4 cup water
  • 1 big red onion thinly sliced
  • 3 garlic cloves
  • 6 tsp ghee
  • 3 tsp oil
  • salt to taste
  • 4 cloves
  • 3 cardamom pods
  • 1 or 1 & 1/2  inch cinnamon stick
  • 1 bay leaf
  • 1/4 star anise
  • A pinch of sugar


For garnish
1/3 cup cashews
1/3 cup golden raisins


Go:

 
  • Wash and soak the rice for 20 mins. after 20 mins drain the water and set aside
  • In a deep pan, add 3 tsp of ghee and 1 tsp of oil and fry the cashews till golden and set aside.
  • Now fry the raisins till plump and set aside
  • Add about 1/2 cup of the thinly sliced onions and fry till translucent.
( add some oil if needed)
  • Now add a pinch of sugar to caramalize them and fry till brown. set aside this is for the garnish.
  • In a pressure cooker or heavy bottomed pan, add the remaining ghee and oil.
  • Once oil is hot add the cloves, cardamom, cinnamon, staranise and let it splutter.
  • Add to the remaining sliced onion and fry till pink.
  • Add the garlic and saute for a few mins till nice and fragrant.
  • add the rice and fry till they are pink and opaque.
  • Add water, salt to taste, mix well.
  • Cover the pressure cooker and let it cook for 2 whistles and turn the heat off. take it off the stove.
  • if you are cooking on a stove top, let the rice boil for 5 mins, simmer and cover and cook till the grains are done. fluff them in between.
  • Once the pressure is released, transfer to a serving bowl and garnish with the cashes, raisins and caramalized onions.
I served with some cucumber slices  ( may be went a bit over the top) and kuruma.


Had a wonderful evening with friends and food !

Thursday, March 17, 2011

Room

If you haven't read this book yet, please do soon! It's an easy read and was very popular last year.
This is a story told by a 5 yr old who is trapped inside a room. It's interesting to see life narrated by a 5 yr old and has its own twists and turn.


source: Google images

Emma Donaghue, the author is an excellent writer and this is her first book that I read.

Cutting for stone, Abraham verghese


A story about twins born to an Indian nun and a famous british Surgeon set in Addis Abba, Ethiopia. There is a lot of medical jargon here, but i enjoyed it a lot. Ethiopia always brings picture of starving, hungry looking children to me. But this book shows the beautiful side of Ethiopia.
So folks, get these 2 books and enjoy!

Tuesday, March 15, 2011

Microwave therattipal


"Therattipal"! It is such a wonderful south indian milk sweet, similar to Khoa I guess! it takes a lot of time to make it on the stove top,as you reduce the milk with sugar and until it almost crumbles!

 I made this in literally 3-4 mins, thanks to the best thing in the world aka "Condensed Milk"
I used to beg my mom to lick that milkmaid tin back home. Condensed milk was used on special occasions to make payasam, when you need that rich taste.
Now my son begs me to lick the can!
To make this therattipal, all you need is a deep bowl and few ingredients!
The cooking time depends on the power level of your microwave. It took me 2 mins and 10 seconds

Get ready:

  • 1 can condensed milk
  • 1 & 1/2 tbsp yogurt
  • 2 tsp Ghee
Go:

  • In a micro wave safe bowl, add the condensed milk, yogurt, ghee and mixwell.
  • Cook uncovered  for 1 min, open the MW door, stir well
  • Cook again for 1 min
  • By this time it will start not to stick to the container
  • Stir well and cook in increments of 10 seconds till it leaves the sides well.
  • Let it cool and enjoy!
Leena of nammaruchi was so sweet to share an award with me! I am so honored and would like to covey my special thanks to her. Do check out her blog as she has some really good recipes!

Feel free to pick this award from here as everyone is my friend!

Friday, March 11, 2011

Karadaiyar Nombu Adai


Karadaiyar nombu/ vrat is usually celebrated during the beginning of the tamil month" Panguni"and the end of ' maasi".The legened behind this vrat is that ( from mahabharatha) savithri fought Lord Yama to save the life of her husband Satyavan.  if you want to read about the story Check here!
 Nombu or vrat is celebrated by women offering  prayers to be together with their beloveds for ever and offer &"adai".
Savithri had to be a minimalist in the middle of the forest and immense sorrow. So she made offerings with what she had to save her husband.
But I have no idea how adding  beans, cilantro and all other exotic spices to these adai came! Yama was tired of eating all the tasteless ones I guess!

We usually make sweet and savory adai during this pooja.  best results are by using fresh rice flour.

Get Ready: (yields 10 sweet and 10 savory ones)

Vella Adai

  • 1/2 cup rice flour
  • 1 tbsp black eyed beans
  • 2-2/12 cups of Jaggery powdered
  • 1 tbsp coconut grated ( ideally thin wedges of coconut are used)
  • 1 tsp cardamom powder
  • 2 cups water

Uppu Adai

  • 1/2 cup rice flour
  • 1 tbsp black eyed beans
  • 1 tbsp cocnut
  • 1 green chilli
  • a pinch of asafetida
  • salt to taste
  • 1& 1/2 cups water
  • 1 tsp oil
  • 1/2 tsp mustard seeds
  • 1/2 tsp urad dal
  • cilantro and curry leaves
Go:

The first couple of steps in the preparation is the same for both vella and uppu adai.
  • In a pan add a drop of oil and fry 2 tbsp of black eyed beans for a couple of mins.
  • Let it cool and cover with water and pressure cook for 3 whistles.
  • In a pan dry roast the 1 cup of  rice flour till pink or nicely fragrant. set aside and divide into 2 half cups.

For the vella adai:

  • In a pan,add 2 cups of water and the jaggery. once dissolved, strain the jaggery water to remove any dirt.
  • let it boil after straining.
  • Now add the 1/2 of black eyed peas, coconut, cardamom powder and 1/2 cup of rice flour and stir well.
  • It should come together without sticking to the pan. turn the fire off and set aside. If it looks too dry, sprinkle some water.

For the uppu adai:

  • In a pan, ( yes, lots of dishes to wash!) add 1 tsp of oil and do tadka with mustard seeds and urad dal, curry leaves and hing.
  • Add 1 & 1/2 cups of water. once it comes to a boil, add the remaining BBP, coconut, salt to taste, cilantro and the rice flour.
  • Mix well till it is in the same consistency as the sweet dough.
  •  turn the fire off.
Final step:
  • Once you can handle the dough, make small balls, flatten them and make a hole in the centr like vadai. use some water to prevent it from sticking.
  • In a greased idli stand, steam these adai for 10 -15 mins or till they look shiny.
  • Offer to god with butter and enjoy his blessings!
This year the nombu is on March 14th in the evening.

Tuesday, March 8, 2011

Colorful Bell Pepper Subzi


Bell Peppers!

I just love them, Don't you? If not please start loving them soon!


Bright orange, red, green wonderful feast for one's eyes and crunchy, juicy and sweet, an orchestra of tastes for your palate.

I make sambhar, curries, rice, chutneys, dips so many things with them. I usually use a powder of roasted channa dal, coriander seeds, redchilli and some coconut when I make a dry curry.
This time I used peanuts and sesame seeds and they were wonderful.
So, let us get to the recipe soon!


Get Ready : serves 3

  • Bell peppers 3 ( I used green, yellow and red) chopped
  • 1/3 cup dry unsalted roasted peanuts
  • 5-6 tsp sesame seeds
  •  1 & 1/2 red chilli
  • 1 tsp dhania/ coriander seeds
  • 1/4 tsp asafetida/ hing
  • 1/4 lemon juice
  • 2 tsp oil
  • mustard seeds, urad dal for tadka
  • Chopped cilantro

Go:

  • Dry roast the peanuts, I know they are roasted already! Just toss them for a few seconds, set aside
  • Dry roast the sesame seeds constantly stirring till they pop and fragrant.
  • Add a drop of oil and fry the red chilli and coriander seeds.

  • Once cool, dry grind the roasted spices with 1/4 tsp asafetida to a coarse powder. make sure you addthe sesame seeds, redchilli, dhania first and add the peanut at the end.
  • In a pan, add 2 tsp of oil and do the tadka with mustard seeds and urad dal.
  • Add the washed bell peppers, salt and mix.
  • Reduce heat, cover and cook them till soft.
  • Check salt to taste, add the dry roasted spice powder and mix.
  • Cook of low fire, open till the spices are well coated and well incorporated with the peppers. Takes about another 10 mins.
  • Turn the heat off, squirt juice of a quarter lemon and garnish with cilantro.

Goes well with rice, chapathi or sandwiches!

Sunday, March 6, 2011

Ramekin Eggplant Bake


Here is a very easy eggplant bake, similar to eggplant parmesan with no carbs! They are so cute baked in ramekins and easy to serve and make especially if you are making for less number of people.

I love eggplant, but not my husband and son. I made this for lunch one day and my two year old loved it! Thanks, there is another egg plant lover in the house.

Get Ready : (serves 1- 2)

  • 1 small egg plant ( not indian, japanese variety)
  • Store bought marinara/ pasta sauce
  • Part skin ricotta cheese
  • Cilantro
  • salt to taste
  • sambhar powder
  • Olive oil


Go:

  • Pre heat oven to 400F
  • Cut egg plants into 1/4 or < 1/4 "' thick rounds.
  • Drizzile oilve oil, salt, a pinch of sambar powder. Rub it over the eggplant till well coated
  • In a foil lined baking sheet, bake the egg plants till soft or until 10 mins.  I also tried to cook them on the tawa, but liked the oven better.
  • Grease ramekin with non stick spray.
  • Spoon some marinara sauce at the bottom of the ramekin.
  • Put a layer of egg plant round, spoon some ricotta and cilantro.
  • repeat the layer with sauce, egg plant, ricotta and cilantro till the ramekin is full.
  • Sprinkle some parmesan and bake uncovered at 350F for 20 mins till the cheese is bubbly.
  • I did not have parmesan and hence omitted the top cheese layer.
Invert on a plate once a little cool to serve ot dig in from the ramekins.


Thursday, March 3, 2011

Mushroon Paneer Masala


Browsing through  Aipi's curries with gravy, this one caught my attention. I had mushrooms and all the other stuff needed for this yummy gravy, and before I knew I was making this!

Couple of things that i did differntly was did not microwave the onions, ginger, instead just ground them raw and fried them. I did not use yogurt to the gravy as i mine was the right consistency for our family with water alone.

On the whole, it was an awesome side  dish to go with rice or bread.

Get ready:

  • 1 medium onion chopped and ground to a paste
  • 2 cups tomato pulp ( got from 4 medium tomatoes)
  • 10 -15 button mushrooms chopped
  • 1/3 cup peas
  • 1 tbsp xashews soakedwith 1 tbsp water
  • 3/4 diced paneer
  • 1 cup water
  • 1/2 tsp ginger garlic paste
  • 1 tsp coriander powder
  • 1 tsp cumin powder
  • 1 tsp redchilli powder
  • 1/2 tsp garam masala powder
  • 1/8th tsp turmeric powder
  • 1 tsp kasoori methi crushed
  • salt to taste
  • 4 tsp oil
  • cilantro to garnish

for the tadka

  • 1 tsp cumin seeds
  • a pinch hing
Go:

  • In a deep pan, i used a small pressure cooker, add 1 tsp oil and saute the paneer till golden and set aside.
  • Let the cashews soak for 20 mins and grind to a paste, set aside.
  • Add 3 tsp oil in the same pan, add the cumin and hing
  • Once the cumin splutters, add the ground onion paste and fry till pink.
  • add the ginger garlic paste and fry for few seconds till aromatic.
  • Now add the pureed tomatoes,cashew paste, turmeric, corainder, cumin and other masala powders and  cook till the oil separates.
  • Now add the mushrooms, peas, 1 cup of water, salt to taste and mix well.
  • Let it come to a boil and simmer for 15 mins till the peas and mushrooms are cooked.
  • Add the kasoori methi, paneer, mix well and turn the heat off.
  • Garnish with cilantro and dig in!
Sending this for tried and tasted of US masala , started by Zlamushka and now owned by Kitchen chronicles


Thanks Aipi for this recipe!