Wednesday, November 29, 2017

Beans Paruppu Usili Instant Pot


I have been experimenting with OPOS and instant pot trying several dishes. OPOS has definitely shortened the time it takes to cook and everyday I am fascinated by the things I learn from OPOS. Beans paruppu Usili or beans lentil crumble is a delicacy of a South Indian feast and many people are intimidated in making this. But with the method I am sharing with you, one does not have to be scared of making paruppu usili. This dish is usually made with green beans, cluster beans, banana flowers and it is perfect combination for more kuzhambu.

Get Ready


  • Green beans, washed, trimmed and finely chopped 2 cups
  • 1/3 cup of channa dal
  • 1/3 cup of toor dal
  • 2  dried red chili
  • 1/4 tsp as afoetida
  • salt to taste
  • 1 tbsp oil
  • 1/2 tsp mustard seeds
  • 1/2 tsp urad dal
  •  few curry leaves
Soak the chana dal, toor dal with dried red chili in water for about 30 mins. drain the water and grind it coarsely with some salt and asafoetida. set aside.

Instant Pot method:

  • Turn the IP on. 
  • In the inner pot, add one tablespoon of water, the beans, 1/2 tsp salt.

  • Keep the trivet in the middle.
  • Transfer the ground dal paste to another vessel and keep it on top of the trivet

  • Close the IP. press Manual/ pressure cook and set time for 0 mins with vent in sealing position
  • Once the timer beeps, do a Quick Pressure release and  and open the pot.


Pressure cooker/ OPOS method

  •  In a 2 litre pressure cooker, add a tbsp of water, chopped beans and spread the ground dal mixture on top of the beans. Cover the cooker, place the weight and turn the heat on.
  • Cook for 2 whistles with the flame covering the base of the cooker.
  • Release pressure manually and marvel at the green color of the beans.
The next step is common for both methods.

  • In a pan, add the oil and do the tadka/ tempering with mustard seeds, urad dal and curry leaves.
  • Crumble the cooked dal mixture and add it to the pan.
  • Use the back of your spoon and crumble the mixture and roast  in oil for 1-2 mins
  • Add the cooked beans without any water and toss them well with the dal mixture.
  • Add salt per taste.
  • cook on low fire till the dal mixture is crispy. it make take about 7-10 mins
  • Serve with rice, mor kozhambu, samabr or rasam
Let me know if you tried it and liked it.

Monday, November 27, 2017

Kadai Paneer Instant Pot


This is a very yummy and easy dish to put together in no time. I have adopted the technique of cooking everything in one pot under pressure as OPOS and applied to the IP.
You can check my other paneer, non IP posts HERE
This dish is inspired by OPOS kadai paneer. Recipe source:From Here


  • 1 green bell pepper, deseeded & cut in chunks
  • 1 red bell pepper same as above
  • 1 carrot peeled & sliced
  • 2 roma tomatoes deseeded & cut in chunks
  • 1 small red onion cut 
  • 1 -2 green chilli slit lengthwise
  • 1/2 block of store bought paneer cut into small cubes
  • 1-1.5 tsp salt to taste
  • 1 tbsp oil
  • 1 tbsp tomato ketchup
  • Cilantro

Spice mix
  • 1 tbsp coriander powder
  • 1 tbsp cumin powder
  • 1 tbsp kasoori methi crushed in ur palm
  • 1 /2 tsp turmeric powder
  • 1 tsp ginger garlic paste/ powder
  • 1 -2 tsp red chili powder ( depending on taste)
Go
  • In a bowl add the spice mix, paneer. Toss them well till the spice mix coats all the paneer. Set aside the paneer. Keep the excess spice mix.

  • Turn IP to saute. Add oil, once hot add the onions & saute

  •  add the green chili, tomato & saute for few mins

  •  add the bell peppers, carrot, salt, remaining spice mix powder and toss them well.

  • Add paneer as a top layer. Do not mix
  •  cancel saute
  •  close IP with the vent on sealing position
  •  Pressure cook or manual for 0 mins.
  •  Do a QR and be amazed the beauty of peppers & paneer.

  •  Garnish with cilantro and enjoy!

Monday, October 30, 2017

Instant pot apple thokku


I have not blogged in a while and am happy to come back and share a lip smacking recipe with you all. It is fall season and there are plenty of apples every where. I have made a lot of recipes using my instant pot and pressure cooker. You would have seen them on  face book pages if you are in those instant pot for indian and OPOS group. Here I am today sharing a mouth watering south indian thokku using green apples or granny smith apple. My mom made them once when she visited the US. She grated the apples and made them like a mango thokku. I was lazy to grate and all and dumped them all in the instant pot and make this thokku.

They are a perfect combination with curd rice, idli, dosa, chapathi or on toast.


Get Ready
  • Green Apple 4, washed, cored and cut into chunks
  • 10-12 dried red chilli

  • Salt 2-3 tsp or per taste
  • 1/2 tsp turmeric powder
  • 1 tsp asafoetida
  • 1/4 cup gingelly oil( one can use canola too)
  • 1 tsp mustard seeds
  • 1 tsp brown sugar ( optional)
  • 1 tsp methi seeds, dry roasted on low flame and pounded
Go

  • Turn IP to saute. Add all the oil. Once hot add mustard seeds and let them crackle.
  • Tear apart the red chilli and add to the oil.
  • Add the turmeric, hing, apples brown sugar and give a toss.
  • Cancel saute
  • Cover the IP,  turn the weight to sealing and cook on manual for 15 mins. Let the pressure release naturally

  • With your immersion blender pulse several times in the pot till the chili is blended.

  • Turn on saute, and let it simmer for 10-15 mins till thickened. It will splatter a little. So use any lid to cover. Add the roasted methi seeds powder.
Once cooled save in a clean dry container, refrigerate and enjoy as a side dish. Spicy, sweet, tangy pickle is ready!

Tuesday, August 15, 2017

Instant Pot Vegetable Ramen Noodles


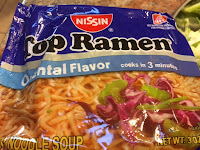
Here I am with another quick and easy noodle recipe in Instant Pot. It is incredibly easy and delicious too. You kids will love it and so will the grown ups! I used the "Nissin" brand oriental flavor, which is the only vegetarian version available on the markets. We can also use maggi noodles and add any vegtables of your choice. I used the spice packets that came inside the noodles and also added some soy sauce, tomato ketchup and red chili flakes to spice it up. You can use 3/4 cup water per pack of noodles.

Get Ready ( serves 3)


  • Instant noodles 2.5 packs
  • 2 packs of the spice mix powder

  • 1 small onions sliced
  • 3 cloves of garlic
  • 1 tbsp grated ginger
  • 1 carrot peeled and juliened
  • 1/2 cup shredded cabbage
  • 1/2 cup broccoli florets
  • 1/2 green bell pepper 
  • 1tbsp oil
  • 1 cup water ( the picture shows only 3/4 cup, i added more to the IP)
  • 1 scahet soy sauce ( i am cheap, used the one from a chinese take out)
  • 1-2 tbsp of tomato ketchup
  • 2 -3 tsp red chili flakes as per taste


Go


  • Turn the IP to saute mode. Add the oil. Once the display shows hot add the onions, ginger, garlic and saute till the onions are translucent

  • Add all the vegetables and saute for a few mins

  • In a cup of water add the spice mix that comes with the noodles, chili flakes, soy sauce and whisk every thing well

  • Break the noodles  and arrange them on top of the vegetables or just drop them in
  • Add the water to the IP, and tomato ketchup.


  • Mix every thing well.
  • Cancel saute.
  • Press manual/ pressure cook and adjust timer to 5 mins.
  • Wait for natural pressure release or do a Quick Release ( QR) after 5 mins and noodles is ready.
Enjoy this any time of the day!

Wednesday, August 9, 2017

Potato Masala Instant pot


Potato masala or more commonly addressed as poori masala is very simple side dish from Tamil Nadu. it goes well with poori, chappathi and drier version used as filling inside masal dosai. This dish is inspired by the OPOS technique, but cooked in the instant pot. I have blogged a couple of OPOS recipes here and if you are interested in learning about, please check out OPOS on you tube.

Let us get to the making the dish now. I used Yukon Gold potatoes and did not bother to peel the skin. If you don't like the skin of the potatoes, please peel and then proceed with the steps.

Get Ready ( serves 3-4)


  • 2 medium sized yukon gold potatoes, washed and cut into large chunks
  • 1 medium onion sliced
  • 2 green chilies slit
  • 1 inch piece of ginger, peeled & julienne
  • a few  sprigs of curry leaves

  •  cilantro to garnish
  • 1-2 cloves of garlic (I did not use garlic)
  • 1/4- 1/2 cup water
  • 2 tsp sunflower oil
  •  1 tsp mustard seeds 
  • 1 tsp urad dal
  • 1 tsp chana dal
  •  1/4 tsp turmeric powder
  • A pinch of asafoetida
  •  2 tsp salt or per taste
  •  1 tbsp lemon juice
Go

  • Plug in the instant pot and turn on saute  function, add oil
  • Once hot appears, add the mustard seeds, urad dal, chanal dal, asafetida curry leaves and do the initial tempering

  • Add the onions, green chili, ginger and saute covered for 2 mins
  • Add the potatoes, salt, 1/4 cup water.

  • Press cancel to stop saute function
  • Press manual or pressure cook on IP mini and set the time to 4 mins
  • Cover with the lid and sealing position
  • Do a Quick Pressure release 7 mins after the initial cooking of 4 mins is done

  • Take a potato masher and mash everything coarsely in the pot.

  • If too thick add water as per your desired consistency
  • adjust salt and spices.
  • Press saute and let it boil for 1-2 mins. Add lime juice, cilantro, cancel saute and keep it warm.

Serve with poori, chapathi, paratha or any mixed variety rice.

Monday, August 7, 2017

Arachuvitta Sambar Instant Pot


I recently posted my views and experience about an Instant Pot. You can check it out HERE
Today, I am presenting a simple, tasty sambar made with pearl onions or chinna vengayam. My kids love these pearl onions and call them baby onions. I used to buy fresh ones them in a bag, but it takes a long time to peel them. As, I my kids eat a lot of these onions, I use the frozen ones available from Trader Joe's.


This is for those who don't know much about sambar. In the south, you have 2 main types of sambar. The first one is called " podi potta sambar" which literally means sambar  made with pre ground spice powder. The next one is a " arachu vitta sambar" which means roasted and freshly ground masala sambar. One can add any vegetables to be in this sambar. But traditionally people use, onions, moringa or drumsticks, egg plant, okra etc.

There was a recent article on pubmed which showed there is les chances of developing dementia at older age if you eat sambar every day! So, all my friends make sambar and keep your memory cells.

I made  this pearl onion arachu vitta sambar over the weekend to go with hot fluffy idlis. My kids enjoyed it thoroughly and am hoping you all will too. This is a very easy recipe and I used precooked toor dal. If you don't have pre cooked dal, just wash & soak toor dal in water for about 20 mins and directly add to the recipe.

Get Ready:

To Roast and grind


  • 2 tbsp Coriander seeds ( dhania)
  • 2 Tbsp Channa dal
  • 1/4 tsp methi seeds/ fenugreek
  • 3 -4 red chillies ( depending on your spice level)
  • 1/4 cup thawed dessicated coconut
  • 1/4 tsp asafoetida powder


To Temper/ tadka

  • 2 tsp coconut oil
  • 1 tsp mustard seeds
  • a few sprigs of curry leaves or kariveppilai

For the sambar

  • 1  cup pearl onions
  •  1/2 Roma tomato chopped
  • 1/4 carrot cut into pieces
  • a small marble sized tamarind ,soaked in 1/4 cup water and juice extracted
  • 4 tbsp cooked toor dal ( if dry use 1/4 cup)
  • 2 tsp salt or per taste
  • 1/4 tsp turmeric powder
  • a small piece of jaggery ( optional)
  • 1/2 cup water
  • cilantro to garnish

Go


  • On the stove top, take a pan add a tsp of oil & roast all the ingredients under roast and grind except coconut and asafoetida powder till golden and aromatic.
  • Let it cool. grind the roasted ingredients with coconut and asafoetida with water to a smooth paste. Set this aside.
Ground masala with water

  • Plug in the IP, turn on saute mode.
  • Add the coconut oil, once hot, add the mustard seeds and let them crackle.

  • Add the curry leaves.
  • Add the pearl onions and saute for a few mins.
  • Add the chopped tomatoes, carrots and saute for a min.

  • Add the tamarind extract, turmeric powder, salt, jaggery &the ground paste and mix. Check for salt level and adjust as per taste.
tamarind extract and cooked toor dal

  • Add 1/4  cup of water.
ground coconut masala paste added

  • Press cancel on IP
  • Press Pressure cook on you mini ( manual on regular IP) and reduce the time to 6 mins.  ( use 8 mins if using uncooked dal)
  • Close the IP with the vent on the sealing position.
  • You will notice the IP will start counting down from 6 once it attains full pressure and the metal prong pops up.
  • Once it is cooked for 8 mins, the IP will go on to display L00. wait for natural pressure release and open the IP

  • Your sambar is ready. Mix well. if very watery, let in simmer on saute for a few mins. But the sambar will thicken naturally once it is cool. if too thick add a little hot water and simmer till the desired consistency is reached.
  • Garnish with cilantro and serve piping hot. It goes well with Idli, dosa, pongal or just to mix with rice and eat.


Sunday, August 6, 2017

Instant pot: Is it what you want?

I was debating since last thanksgiving whether if I should give in and get an instant pot or not! Finally, I gave in! I use my stove top Indian pressure cooker a lot, I mean A LOT! I was not keen to buy another kitchen gadget just sitting around in my kitchen. I spent hours looking online, reading reviews on Amazon to get a clear idea. But, I was even more confused after doing all the research.

I joined social media groups for instant pot and found that a new mini instant pot, 3 quart was available in the market. I was torn between choosing a 3 quart versus 6 quart.  I know I sound crazy, but hey, My zodiac is libra &; I am supposed to confused when t comes to making choices.

Finally, I made up my mind and ordered the instant pot mini, from Amazon. The pot arrives just the day before we plan to go on a vacation. The inner 3 quart vessel looked much smaller than what I had imagined. But, I thought it should be ok as it is just myself, DH,DD at home. My DS was moving to college and my DH travels a lot. So, reassured myself saying it is just 2 people or 3 max and this size should be ok for our family. I kept dreaming about my new toy, how to use it, what to cook in it etc etc. Unbelievable isn't it!"

We return from vacation, and the first thing I cook in the instant pot was rice! Let me tell you something, I just wanted to cry. The rice turned into a big MUSH! I was heart broken guys!
But, I did not want to give up! I figured out what went wrong and worked on understanding my IP better. So far, I have successfully cooked plain rice, toor dal, pav bhaji masala, tomato rasam and onion arachu vita sambar. I have been very happy with my purchase and will share my recipes soon.

So, the bottom line of is Instant Pot for you .....

Pros:
1. It is versatile ( sauté, pressure cook, slow cook, yogurt maker, delay start, keep warm etc)
2. It is safe
3. One does not have to count whistles, and baby sit like a regular pressure cooker
4. It looks sleek
5. You can cook more and freeze with out much worries
6. One can take take it on trips and cook as all you need is power outlet

Cons:

1. It is much expensive than a pressure cooker
2. It is slower than a regular pressure cooker to build up pressure and cook. ( my prestige, butterfly pressure cookers are so much faster in building up pressure and cooks faster)
3. Uses electricity compared to gas


This has been my experience with IP.

Friday, August 4, 2017

Cauliflower Peas stir fry / Mattar Gobi


I have been busy lately and could not blog as much as I wanted to. Today I wanted to share with you a very simple stir fry made with cauliflower and peas using a  good old pressure cooker. Wait, I hear your mind voice saying,cooking cauli in the pressure cooker would make it a mush right? But, It does not if you follow OPOS technique.

I had mentioned in my previous post about OPOS and shared the recipe for rawa kesari. For people who have not heard about OPOS, it is a short form of One Pot One Shot, an innovative method of cooking initiated by Mr Ramakrishnan. OPOS is fast, healthy, clean and environmental friendly. One may be intimidated and hesitant to try this concept of cooking, but trust me it is  very efficient. Once you get the hang of it, you are going to be addicted to OPOS!

All you need is a good working pressure cooker, measuring spoons and the mind set to learn.


https://www.youtube.com/watch?v=f6FgPMwt0pw&list=PL1A5ukabJeD51pa9Ts1vzFKi_SdYuO50F
Check out this video to learn more about OPOS cooking style. One needs to follow the steps of standardization before jumping into doing all the recipes.

This recipe is from OPOS channel and I used spices according to my liking. The addition of water oil base with curry leaves act as a buffer zone when you are cooking veggies directly in a pressure cooker and prevents burning. One can replace curry leaves buffer to chopped onions  as well. The original recipe calls for dunking he cauliflower florets in boiling water for a few minutes before adding to the cooker. But, this step can be skipped, if you wish to as I did.

I used a aluminum Prestige pressure pan. if you are making smaller/ larger quantities use a 2 lt or a 5 lt pressure cooker.

Get Ready ( serves 4) Cooking time 8 mins, Prep time for chopping etc 12 mins.


  • 1 large cauliflower, washed and made into florets ( came to about 5 cups)
  • 1/4 cup peas
  • 1/4 cup curry leaves
  • 1 tsp red chilli powder
  • 1 tsp sambar powder ( or any other masala powder you have)
  • 2 tsp pav bhaji masala
  • 1/4 tsp turmeric powder
  • salt 1-1.5 tsp or per taste
  • 1 tbsp oil
  • 2 tbsp water
  • 1/3 cup chopped cilantro or as desired


To temper/ tadka


  • 1 tsp oil
  • 1/4 tsp mustard seeds/ kadugu
  • 1/4 tsp urad dal
Go:

  • Add all the spice powders, salt to the washed cauliflower florets and combine till well coated

  • Take a pressure pan, add the oil, water. Note, the cooker is on the stove yet. This is layer number 1.
  • Add a layer of curry leaves or chopped onions. layer 2

  • Add the spice powder coated cauliflower florets. layer number 3.

  • Add the frozen peas on top. layer number 4.

  • Turn the stove and make sure the entire base of cooker is covered with high flame and not burning the bakelite handles.
  • Place the weight and cook on high flame for 1 whistle. 
  • Turn the heat off.
  • Release the pressure manually and open the cooker. Please make sure the pressure is fully released before opening the cooker to avoid burns, injuries etc
See how the cooked peas and cauliflower retain their color!
  • You may see a little water on the bottom or not depending on the quality of the cauliflower.
  • Cook open till the water dries up.
See, How clean the cooker base is!
  • In another pan, do the tadka and add it to the cauliflower peas mixture.
  • garnish with cilantro and serve.
Tastes great with rotis, rice. I served with both rice , mor kuzhambu and roti.

Thursday, April 27, 2017

Arisi Paruppu Saadham


The name arisi, paruppu saadham literally means rice and lentils cooked. It is similar to the north indian kichdi except toor dhal is used here. Arisi paruppu saadham is very popular in Kovai area of Tamilnadu. There are some variations with the region itself as i understand. I recently found this  recipe HERE and loved the simplicity of the recipe. I tried it yesterday and it was very yummy. My kids and myself enjoyed this rice with some japanese eggplant stir fry and applam. Sona masoori, ponni raw rice may work better, but I had only basmati rice and it turned out just fine.

Get Ready

  • 1 cup basmati rice
  • 1/2 cup toor dhal/ tuvaram paruppu
  • 2.5 cups water
  • 1 small onion chopped
  •  1 roma tomato chopped
  • 1 large clove of garlic sliced
  • couple of curry leaves
  • 2-3 tbsp chopped cilantro
  • 1.5 tsp sambar powder
  • 1/4 tsp turmeric powder
  • 2 tsp salt or to taste
  • 1 tbsp vegetable oil
  • 1/2 tsp mustard seeds
  • 1/2 tsp urad dal
  • 2 small red chillies
Go

  • Wash the rice and the dal well. Soak them together in 2.5 cups of water for 30 mins ( 2 cups water for the 1 cup rice and 1/2 cup water for the 1/2 cup toor dal)


  • In a small pressure cooker, add oil and add the mustard seeds. Once they crackle add the urad dal, red chilies and fry till golden. Add the curry leaves.


  • Add the onion and saute till they are done.
  •  Add the tomatoes, turmeric powder and cook till the tomatoes are mushy.


  • Add the sambar powder, salt to taste.
  • Add the soaked rice and dal with the water.


  • Adjust salt and spices according to taste
  • Close the pressure cooker and cook for 2 whistles. if using sona masoori or ponni, cook for 3 whistles. turn the stove off.
  • Let the pressure go down by itself naturally and open the cooker.


  • Garnish with cilantro.
  • Serve hot with ghee and enjoy