Showing posts with label Traditional. Show all posts

Wednesday, November 29, 2017

Beans Paruppu Usili Instant Pot


I have been experimenting with OPOS and instant pot trying several dishes. OPOS has definitely shortened the time it takes to cook and everyday I am fascinated by the things I learn from OPOS. Beans paruppu Usili or beans lentil crumble is a delicacy of a South Indian feast and many people are intimidated in making this. But with the method I am sharing with you, one does not have to be scared of making paruppu usili. This dish is usually made with green beans, cluster beans, banana flowers and it is perfect combination for more kuzhambu.

Get Ready


  • Green beans, washed, trimmed and finely chopped 2 cups
  • 1/3 cup of channa dal
  • 1/3 cup of toor dal
  • 2  dried red chili
  • 1/4 tsp as afoetida
  • salt to taste
  • 1 tbsp oil
  • 1/2 tsp mustard seeds
  • 1/2 tsp urad dal
  •  few curry leaves
Soak the chana dal, toor dal with dried red chili in water for about 30 mins. drain the water and grind it coarsely with some salt and asafoetida. set aside.

Instant Pot method:

  • Turn the IP on. 
  • In the inner pot, add one tablespoon of water, the beans, 1/2 tsp salt.

  • Keep the trivet in the middle.
  • Transfer the ground dal paste to another vessel and keep it on top of the trivet

  • Close the IP. press Manual/ pressure cook and set time for 0 mins with vent in sealing position
  • Once the timer beeps, do a Quick Pressure release and  and open the pot.


Pressure cooker/ OPOS method

  •  In a 2 litre pressure cooker, add a tbsp of water, chopped beans and spread the ground dal mixture on top of the beans. Cover the cooker, place the weight and turn the heat on.
  • Cook for 2 whistles with the flame covering the base of the cooker.
  • Release pressure manually and marvel at the green color of the beans.
The next step is common for both methods.

  • In a pan, add the oil and do the tadka/ tempering with mustard seeds, urad dal and curry leaves.
  • Crumble the cooked dal mixture and add it to the pan.
  • Use the back of your spoon and crumble the mixture and roast  in oil for 1-2 mins
  • Add the cooked beans without any water and toss them well with the dal mixture.
  • Add salt per taste.
  • cook on low fire till the dal mixture is crispy. it make take about 7-10 mins
  • Serve with rice, mor kozhambu, samabr or rasam
Let me know if you tried it and liked it.

Tuesday, January 3, 2017

Rava kesari OPOS style


When I first stumbled upon the word, OPOS, I was like you all too thinking what in the world is that?
 OPOS stands for One Pot, One Shot a concept initiated and popularized by Mr Ramki.

 The whole concept is cook everything in one pot, a 2 liter pressure cooker with minimal oil. By cooking under pressure, you are locking up a lot of flavors and cooking fast. I searched online and found many people trying out different recipes in a pressure cooker and I was very fascinated by it.

They even have a special face book page for OPOS called UBF ( United By Food).

 So far I have tried making soup, beans poriyal, ghee, pasta, aviyal, chilli paneer in pressure cooker and will share recipes slowly. On the OPOS cooking site, they use a 2 Lt prestige cooker and an induction stove. I have been using my prestige pressure pan and gas stove and have been pleased with the results too.

So, here I am posting my first OPOS recipe for rava kesari. Anyone can make rava kesari is what you are thinking, right? That is why I chose this one as it should be easy and standard. I found a recipe Here and adjusted the sugar for my taste.

Get ready: ( serves 2-3) cooking time 10-15 mins
  • 1/2 cup rava
  • 1/4 cup ghee
  • cashews and raisins as per your taste
For Sugar syrup
  • 3/4 cup sugar
  • 1 & 1/4 cup water
  • A pinch of saffron food color
  • 1/2 tsp cardamom powder
Go:


  • In a pressure cooker bottom, add the water, sugar, saffron color, cardamom powder. Turn the heat on and stir and let it come to a boil.


  • Simultaneously, in another  pan add the ghee and roast the cashews and raisins till golden. Add the rava and roast till it is golden brown and aromatic.


  • If your sugar syrup is boiling and rava is not roasted, just reduce the flame and let the syrup simmer.
  • turn the heat off once rava is roasted and add the ghee, rava, cashew raisin mixture to the pressure cooker.


  • It will bubble up, don't panic. turn the pressure cooker off.
  • Give a quick stir and cover the pressure cooker with the weight on. Remember the heat is off.


Let the rava sit in the cooker for 20 mins. Control your temptation to open the pressure cooker in between.
After 20 mins, open the cooker and there you have your melt in your mouth rava kesari ready!


Wednesday, November 23, 2016

Elai Adai


Elai adai is a traditional kerala dish made on special occasions. Rice batter is stuffed with sweet filling of coconut, jaggery, jack fruit, folded in banana leaf and steamed to perfection.  Some people also call it "Valsan". I did not have fresh jack fruit and hence used a table spoon of chakka varatti which I got from India. You can omit this jack fruit and just do with coconut alone. I added some cashews just to give a nice texture and crunch to the poornam. You can see the display of my sweet at the contest, as I did not have time to take close up pictures.

I recently participated in a desert contest where the ingredient that need to be used was rice. I made elai adai and it came out very well and liked by many. I got this recipe from my chithi/ aunt and would like to thank her for encouraging me to do this. One can also use savory filling instead of he sweet one. I made one with sauted onions, corn and zucchini and steamed in banana leaf and it was yummy too.

Get Ready

To make  the rice batter


  • 1/2 cup raw rice ( ponni raw rice)
  • 1/2 cup parboiled rice ( puzhungal arisi)


Soak the rice in water for at least 3-4 hrs. drain the water and grind them into a very smooth batter without much water. set aside. The batter should be  like the consistency of pancake / idli batter.
Take a tbsp of the batter and add 3-4 tbsp of water in a vessel. Cook on a low flame stirring till the thin rice batter water mix becomes a thick paste or " kanji" like. See the consistency of the batter in the picture.
Let it cool completely and add it to the rice batter. whisk it well without any lumps and set aside. This step will help your outer covering of the adai stay soft for a long time. 

To make the poornam /stuffing


  • 1 cup grated jaggery/ vellam
  • 1/4 cup water
  • 1 cup freshly grated coconut
  • 1 tsp cardamom powder
  • 2 tbsp  whole cashews, broken into small bite size pieces, roasted golden in ghee
  • 1 tsp ghee
In a pan add the jaggery and add water just enough to soak the jaggery.


let the jaggery melt, strain the mixture to remove any dirt.
Return the jaggery water mixture to the stove and let it come to a frothing boil and thick.


Add a drop of the frothing " paagu" to a small bowl of water, you should be able to make a small ball, which will be like the consistency of slime.


Add the coconut, cardamom, cashew pieces and ghee and cook till the stuffing is sticky but also leaves the side of the pan. Turn the heat off & set aside. you can add  1tbsp chakka varatti at this point and mix. This step is optional. Now the poornam is ready.

To make the adai

Banana leaves  rectangular pieces at least 20- 25 cm long. If the leaves are older, it is better to fold them. if you have fresh leaves, just show them on the flame of your gas stove. This is called " elaya vattaradhu". This step will make the leaves more pliable to fold.
Add a small ladle of the rice batter at the center of the banana leaf. Spread it thinly like a small dosa. This is called " maavu ezhudharadhu".


Add a spoon of the  poornam to one side of the rice batter.


 Fold the banana leaf in half. Fold the all sides and flip and keep them aside with the folded side down. 


Arrange these in a idli plate and steam in  the cooker (without weight) for 20 mins. Once steamed, the banana leaf will change color. You can see how I had folded the leaf. By this, the poornam get smeared all over the rice flour.


Once cool, open the leaf packet and enjoy the elai adai. It will taste so good with the smell of banana leaf, jaggery, coconut etc.

Here is a picture of he savory elai adai, opened.


Thursday, September 10, 2015

Crispy Onion Rava Dosa ( Restaurant Style)


Here is a very simple and easy recipe for a crispy, hotel style Onion rava dosai. We recently were in London and my daughter loved the onion rava doasi served at Hotel Saravana Bhavan. We ate there 4 times during our stay and every time, my little girl wanted to eat the same dosa. She does not care for chutney, sambar for dipping and is just happy with a little bit of rasam. I make this so often and was actually surprised that I had blogged about it before.

So, Here is the recipe. Use equal measure of rice flour and rava and 1/2 measure of maida or all purpose flour. The other ingredients are all per taste and you can tweak it the way you want. You don't have to soak the rava, rice flour in any thing. It so happened to me that, I made the batter and let it sit for 30 mins before making dosa.

This dosa cannot be spread the same way as regular dosa. Since the batter will be watery, you have to pour it in a circle on a hot tawa slowly from the outside and then slowly fill up the insides.


Get Ready ( makes 10- 15 dosa)


  • 1 cup Rice flour
  • 1 cup Rava/ sooji
  • 1/2 cup All purpose flour/ maida
  • 1 cup butter milk
  • 2 tsp jeera/ cumin seeds
  • 1 tsp black pepper corn/ milagu
  • 3.5 - 4 cups of water (add more as needed)
  • salt to taste
  • 1 tsp grated ginger
  • Lots of curry leaves and chopped cilantro
  • 1 small onion  pretty finely chopped.
  • 2 small green chilly chopped ( optional)
  • oil to make dosa


Go:


  • In a bowl add all the flours, salt, jeera, pepper, grated ginger, curry leaves and cilantro.


  • Add butter milk, water and whisk them all well without any lumps. 

  • If you batter is going to sit for a while, make sure to whisk them all again as the rawa will sink at the bottom and the batter will thicken. Add more water so the batter is watery, but not too thin.

  • Add the chopped onions, salt to taste.
  • Heat your tawa or skillet. Sprinkle some water on the tawa to make sure it is pretty hot. The water should sizzle right away.
  • Pour the batter first forming a outer circle and gradually fill up the inside. It should looks lacy with lots of holes.  I used a rectangular skillet and hence all weird geographic shapes !


  • Add oil and a little bit of ghee for the dosa to cook till brown and crispy. One does not have to flip them to the other side, but you can if you want to.
  • Serve hot with chutney, sambar or molagapodi. I served with Almond chutney which can be found here !

Enjoy the crispy onion rava dosa without counting how many you eat! They taste so good piping hot!


Monday, August 31, 2015

Paal Payasm , Kerala style / Milk Kheer


I have another post on Paal Payasam, where I cook it on a open vessel method. Check out my previous recipe here Paal Payasam

 It takes a little time, but totally worth it.

This version is an easy method of making paal payasam in the pressure cooker. It does not involve a lot of stirring and the final product has a light pinkish color and tastes so good. You need a big pressure cooker and a tall vessel to go inside it. My mom used to make this type a lot, however my mother in law will always make the open vessel type. The rule of thumb for paal payasam is 1 litre milk needs a hand full of rice and half sugar. Kerala red payasam rice gives a great authentic flavor. I did not have that and used sona masoori rice.


Kerala Pal Payasam does not usually have any cardamom, cashews or raisins and just has the milky flavor.

This payasam served during special feasts goes very well with Poli!

Get Ready


  • 2% milk 2 cups  ( 500 ml)
  • 1/2 handfull of raw rice 
  • 1/2 cup sugar


Go:


  • Wash the rice
  • Add the rice to the milk in a tall vessel.


  • Add little water than normal inside the pressure cooker.
  • Keep the vessel with milk and rice inside the pressure cooker.


  • Cover and cook for 3 whistles and simmer for 25- 30 mins.
  • Turn the heat off. let it rest for 15 mins and then open the cooker.
  • You will see the milk changed color and rice cooked well.
  • Add the sugar to this and cook directly on low flame for 10 -15 mins till the sugar completely dissolves, stirring in between.

  • Turn the heat off and serve. This payasm tastes even better when chilled.

Tuesday, August 20, 2013

Chakka Pradhaman / Jack Fruit payasam


August,September & October is the month of  festivities in India. Starting with Varalakshmi pooja till navarathri, one will have endless opportunities to make payasam or other offerings to almighty.

So, here is a quick and tasty payasam made out of Chakka!.
Chakka ( malayalam), aka Palapazham ( tamil) or  jack fruit is very native to the south and east of India. Did you know that it is one of the largest fruits to bear on trees.
It is very seasonal mainly during the summer moths in the tropics. Jack fruit may not be available readily here in the US, but have seen all the time in asian supermarkets.


                                                                     Source from here


                                                                 Image courtsey

Jack fruit has a unique aroma which you will either love it or hate it. Apparently the aroma can be described as a combo of apple, pineapple etc. No, you don't eat the green part of the fruit in case you wonder. There is fleshy and fibrous fruit inside which can be cooked raw or eaten ripe as a fruit.

Chakka Varatti/ chakka varatiyathu or jack fruit jam is made by cooking jack fruit in jaggery, ghee with cardamom and other spices till it becomes like a halwa. Varatti has a long shelf life and can be used to prepare, ilayada, payasam etc.
I remember my parents making them at home and tastes super yummy when hot.

My dad had bought his ready made chakka varatti from palakkad, Kerala and I brought here after my recent trip to India. I don't know if it is available in Chennai!


Get ready


  • Chakka Varatti 1 packet ( 100 gms)
  • 2 Maggi coconut milk powder sachet  ( 100 gms each or 2 cups in total)
  • 1 cup warm water to dissolve coconut milk powder
  • 1 cup 2% milk
  • 2 tbsp broken cashews
  • 1 tbsp Ghee/ clarified butter
  • 1/4 tsp dry ginger powder aka sukku podi ( optional)
  • 1 tbsp small coconut wedges ( optional)


Go

  • Whisk the coconut milk powder in water without any clumps and set aside.
  • Heat the regular milk in a heavy bottomed pan
  • Add the chakkai varatti to the milk. Whisk well and turn of the heat.
  • Let it sit for 15 -20 mins as it will help to dissolve the varatti well in milk.
  • whisk again till the chakkai vartti is fully dissolved i nthe milk.
  • Put the milk back on heat and add the coconut milk.
  • Cook on low fire till the mix comes to a boil.
  • If it is too thick add some more 2% milk till you get to the right Kheer consitency. It will thicken with time, so don;t make it too thick.
  • Turn the heat off. sprinkle ginger powder.
  • In another small pan, add the ghee and roast the cashews, coconut wedges till golden.

Serve Hot or cold.


Friday, April 19, 2013

Paalada Pradhaman

Hope you all are enjoying spring! Not so great for people with allergies huh?


Here is an ultimate payasam/ kheer from Kerala. Palada Pradhaman is made with paal (milk), Ada ( partially cooked rice wafers). Ada pradhaman can be made with jaggery and coconut milk too. But My favorite is the milkier version.
You cook the ada in milk and get it reduced. Palada pradhaman has a milky flavor and takes some time to cook. But, let me tell you it is worth that time!

I had bought a packet of Ada from India which I used. I have not seen them in the grocery stores in USA. We enjoyed this for this Vishu/ Tamil new years's day!


Here is the recipe!

Get ready

  • 5 cups 2% Milk
  • 1 cup water
  • 1/3 cup Ada
  • 1 can Condensed milk
  • Sugar to taste ( i used 4- 5 tsp at the end)


Go
  • Cook the ada as per packet instructions. Boil 2 cups of water. turn the heat off and add the ada. cover and let it stand for 20 -25 mins. drain and set aside.
  • Take a heavy bottomed pan, i used a small pressure cooker without lid.
  • Add the 5 cups of milk, 1 cup of water, drained ada to the pan.
  • keep stirring to avoid burning of milk. It will start to boil over. reduce heat and cook by stirring.
  • milk has to reduce to almost half it's volume. This may take 25 -30 mins.
  • Add the can of condensed milk and stir well.
  • Add sugar as desired for taste.
  • Let it come to a boil and turn the heat off.

Serving suggestions

No need for garnishing with cardamon, cashews etc.
serve warm or cold.

Sunday, October 16, 2011

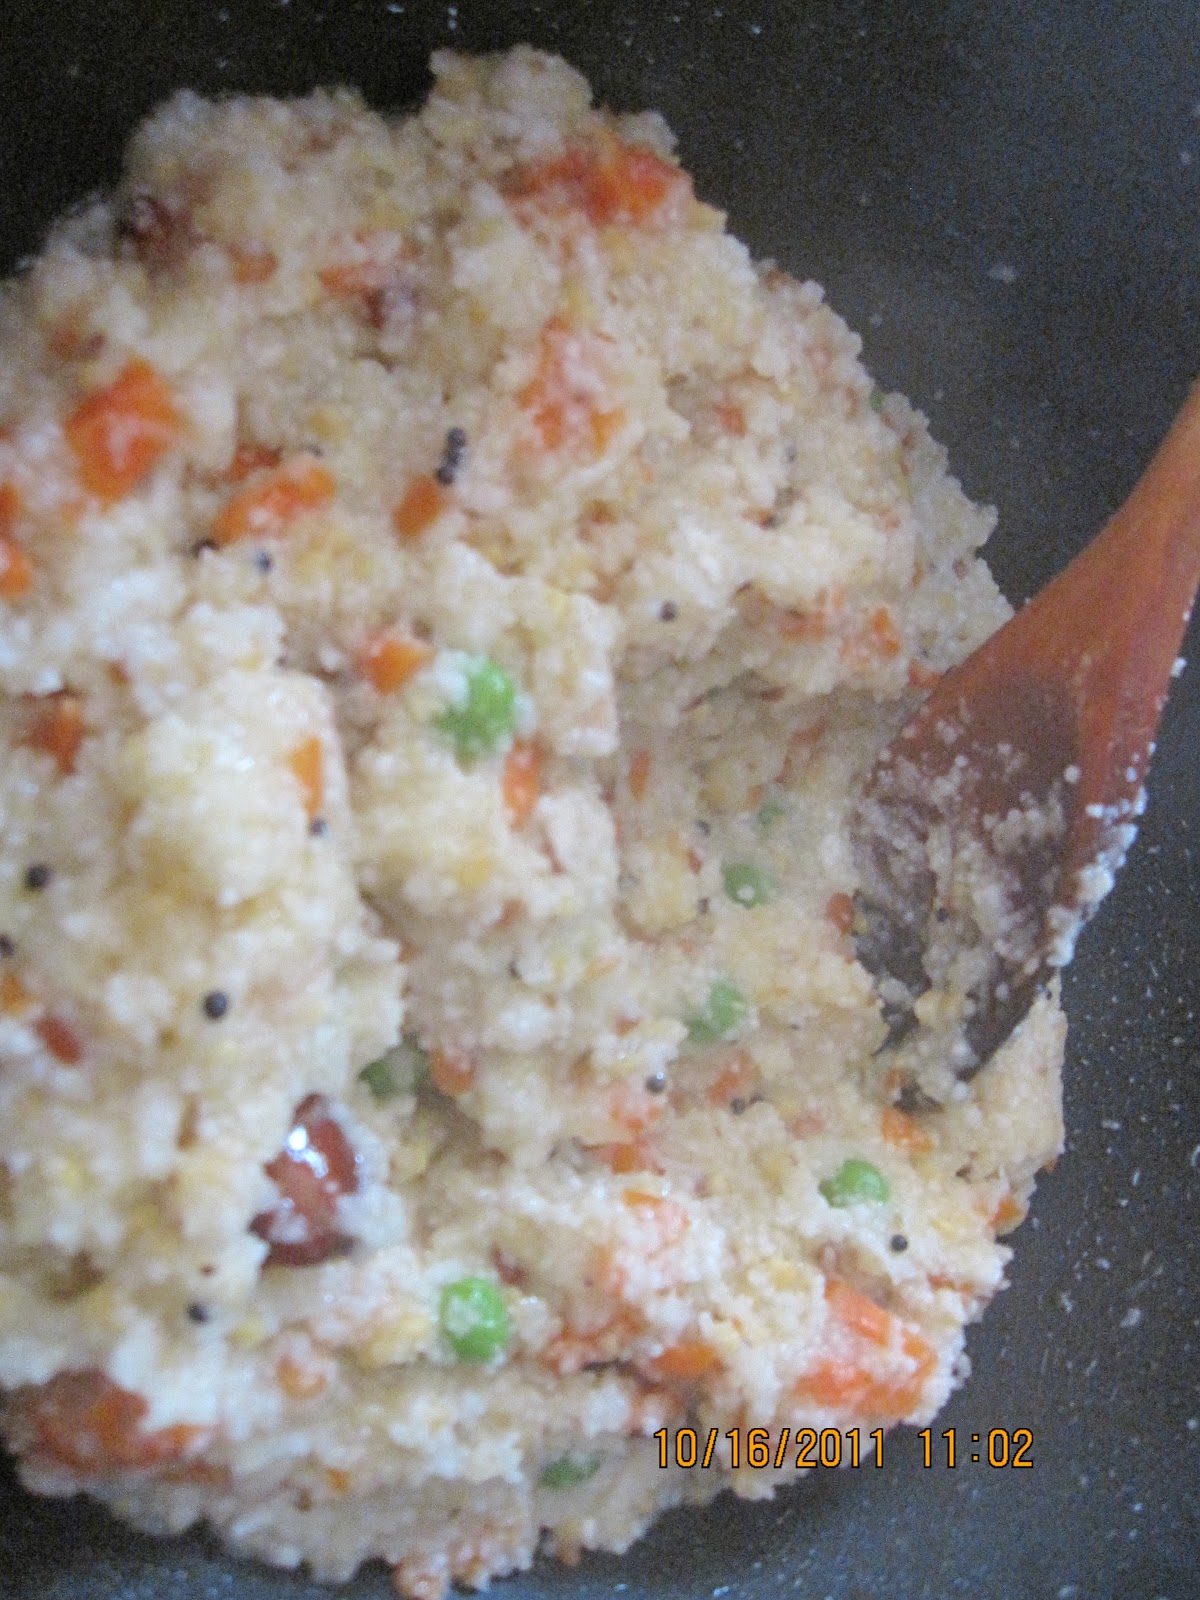
Arisi Upma /Cream of rice Upma

Arisi upma or cream of rice upma is avery traditional breakfast/ evening tiffin in the south. It is usually made in a heavy bottemed bronze vessel called " vengala panai". I was never a fan of this as kid. I remember having a long face whever this was served for tiffin. However I used to like the crispy caked part of the upma stuck to the bottom of the vengalapanai. It is very simple one pot mead made with rice, toor dal, cumin, coconut & spices.

Now as an dult i really appreciate the simplicity of this good old dish. My cousin from Aberdeen, UK had requested this recipe and here it is for you R....

Traditionally no vegetables are added. I added some carrots and peas to make it mre colorful and interesting for the kids. It is up to you to add any vegetables or leave them out. I am presenting a method where a pressure cooker could be used.

The first step here is to make the cream of rice, i.e to make the "kurunai".
Let's get started guys!

Get Ready ( serves 2-3)

  • 1 cup basmati rice
  • 1 fistful toor dal
  • 1/2 tso cumin
  • 1/3 cup finely chopped carrots
  • 1/3 cup frozen pead
  • 1/3 cup grated coconut
  • Salt to taste
  • 1 tbsp oil
  • 2-3 tsp coconut oil ( gives a lot of flavor, mre the better)
  • 1 tsp mustard seeds
  • 1 tsp urad dal
  • 1 tsp channa dal/ kadali paruppu
  • 1 red chilli slit
  • pinch pf asafetida
  • few curry leaves
  • 2 and 1/2 cups water ( if you want very soft consistenct add 2 and 3/4 cup water)

Go:

  • Sprinke some water on the raw rice, just enough to coat all the grains. set aside for 30 mins. This helps to get an evenly ground cream of rice or kurunai.
  • In a blender add the rice, toor dal, cumin and grind coarsely. set aside.

  • In a pan, preferrable non stick add the coconut and regular oil. Once hot do the tadka with mustard seeds, urad dal, channa dal, red chilli, asafetida, curry leaves.
  • Add the carrot, peas and saute for 3 -5 mins.
  • Add the 2and half cups of water,grated coconut, salt to taste.

  • When the water comes to a boil, add the ground rice, toordal,cumin mix.
  • It will boil and splutter. so reduce the heat and cover for 1-2 mins.
  • Open and stir till the the maavu as it is called doesn't stick to the sides of the pan.

  • turn the heat off and cover. let it sit for 5 mins.
  • Transfer it to another vessel and pressure cook it for 1or maximum 2 whistles.


Serve hot with a drop of ghee and sambar, chutney, gotsu. Howevr my favorite is Vellam or jaggery! i used one red chilli which was not very spicy. If you want add more  red chilli during the tadka.

Sunday, August 21, 2011

Milagai Podi/ Idli Dosa Podi/ Chutney Podi


No south-Indian can go without idli and dosas. Sometimes making chutney may not always be possible. Chutney powder or Idli dosa milagai podi always comes to the rescue as a perfect combo for idli dosas. It's made by roasting dry red chilis, urad dal, and sesame seeds. Different households have different recipes to make it. I am sharing a recipe for how it's made in my home.

Get ready!

  • 2 cups urad dal
  • 1 cup dry red chilis (Milagai vatral)
  • 3 tbsp. white sesame seeds
  • 1-1 & 1/2 tsp. asafetida powder
  • Salt to taste
  • 1 tsp. oil
GO!

  • In a pan or kadai, dry roast the white sesame seeds on medium heat till they pop. Make sure not to burn them. Set aside.
  • In the same pan, add the urad dal and dry roast them till golden in color. Set aside.
  • Now add 1 tsp. oil and roast the red chilis till they are crisp and fragrant, making sure not to burn them.
  • Let all the dry roasted ingredients cool.
  • In a blender or spice grinder, blend the red chilis and asafetida first to a nice powder.
  • Next add the urad dal and grind till they are coarse. If you want a fine chutney powder, grind them to a finer consistency.
  • Add the roasted sesame seeds at the end and salt to taste and whiz till everything is blended together.
  • Store this powder in an airtight container and use it as needed.


Enjoy!


    Saturday, August 13, 2011

    Appam / Nei Appam /Unni appam


    Appam is traditional south Indian sweet made during special holidays. It looks similar to kuzhipaniyaram, except it is made mainly with rice and jaggery. They are always available as prasad in most kerala temples. It's soft and fluffy inside with a slight crisp to bite outside. Adding banana, especially " poovan" variety makes it very soft. Adding ghee to the batter makes it quite flavorful and that's the trade off for frying it in ghee!

    I love appams as they are so addictive. I made them today for Aavani Avittam and wanted to share the recipe made in my home with you.

    Get Ready:

    • 1 cup  rice
    • 1 and 1/2 cup powdered jaggery
    • 1/3 cup water
    • 1 tbsp. ghee
    • 1 tbsp. grated coconut
    • 1/2 banana
    • Oil to fry
    • Appakaral or special paniyaram pan

    Go!
    • Soak the rice in water for about 1-2 hrs.
    • Grind the rice with minimum water.
    • Add the coconut and 1/2 mashed banana, halfway while grinding to make a fine batter.
    • Dissolve the jaggery in water and strain any dirt or impurities.
    • Add the jaggery and water to the ground batter.
    • Add a tablespoon of ghee and mix the batter well.
    • Fill oil in your appakaral and heat on high. Once the oil is hot, reduce heat to medium.
    • Add the batter to the holes int he pan filling 3/4.
    • Flip them over after one or two mins. and cook on both sides till golden.

    Enjoy these delicious appams. Another easy way to do is using equal measures of rice flour and atta and mixed with jaggery.

    Happy Indian Independence day to all my fellow blogger 's ! Proud to be an Indian !


    Monday, May 30, 2011

    Mani Kozhakattai / Ammini Kozhukkatai


    I don't know whatz happening with blogger. Are some of you guys experiencing the same problem as I am? I am not able to post comments on certain blogs at all.
    So my dear friends, please don't be mad at me for not posting comments. I have been reading all your updates, but unable to post comments on some blogs. Hope blogger will fix these issues, if real soon!

     
    We were invited by our friend for a special pooja this weekend. I made mani kozhakattai which are basically mini steamed rice dumplings. This is usually made as an evening snack on Ganesha Chathurthi with leftover dough from mornings. Let's get ready!

    Get Ready (serves 2):


    For the rice dumplings
    • 1 cup rice flour
    • 1 cup water
    • 1 tsp. oil
    • Pinch of salt

    For seasoning:

    • 2 tsp. oil
    • 1 tsp. mustard seeds
    • 1 tsp. Urad dal
    • 1 red chili (split)
    • A few curry leaves
    • A pinch of asafetida
    • 1/2 tsp. red chili powder
    • 2 tbsp. grated coconut
    • Salt to taste

    Go!

    • In a heavy-bottomed pan, add the water, oil, & pinch of salt. Let it come to a boil.
    • Add the rice flour to the boiling water and mix well without any lumps.
    • Keep the heat on medium and mix it so it forms a ball of dough.
    • Cover with a lid and turn the heat off.
    • Once you are able to handle the dough, apply oil to your palms and make them into small chickpea-sized balls. Use ALL the dough to form balls.
    • Grease an idli stand and steam these rice balls for 10 mins. in a pressure cooker. They will look shiny when they are done.
    • In another pan, add oil. When hot, do the tadka with mustard seeds, Urad dal, red chili, curry leaves, and asafetida.
    • Add the grated coconut, red chili powder, the steamed dumplings, salt to taste and mix well. Let it cook  on low heat for 2 mins.
    • Turn the heat off.
    • Serve hot with some garnished cilantro.


    Rice dumplings ready to be steamed!


    A perfect evening snack. Enjoy your Memorial day weekend!


    Saturday, April 16, 2011

    Kerala Paal Payasam/


    Kerala paal payasam is one of a kind. It has basic ingredients milk, rice and sugar, but tastes like heaven. If you haven't tasted one, you should try this soon! Paal payasm is equivalent to the rice pudding here and is served during special feasts or poojas like baghavath sevai ( pooja for goddess durga/ bhagavathy).

    The payasam has a slight pinkish color from the reduction of the milk and red rice( chomanantha ari) ,exclusive of kerala. i had some red rice brought from India which I used. One could totally replace it with basmati rice too!
    Another method is to do the payasam in the pressure cooker, which gives a pink color, but some how I doesn't give the same flavor. I cooked mine in the bottom of a pressure cooker (without lid).Stir constantly taking care not to burn the milk. the aim is to reduce the milk to half while the rice gets cooked in the milk. Once the milk is reduced your desired consistency, add the sugar. Adding sugar earlier will not let the rice cook well.

    So you need a little patience and that is totally worth all the effort. You don't need any garnishing for this payasam.

    Here is our family recipe!

    The rule of thumb is 1 fistful of rice for a litre ( 4 cups) of milk. I measured my fistful of rice which was 1 & 1/2 tbsp.

    Get Ready: (serves 2-3)

    3 cups 2% milk
    1, 5oz can evoparated milk
    1/2 cup sugar
    1 and 1/2 tbsp rice

    Go:
    • Add 3 cups of milk to a heavy bottomed pan
    • wash the rice and add it to the milk.
    • let it come to a boil and then reduce the heat to medium.
    •  keep stirring intermittently as the milk will boil and foam up. stirring will prevent from spilling over.
    • When the rice is half done, add the evoparated milk.
    • Once the rice cooked well and milk reduces  add the sugar.
    • Let it boil for a few mins and take it off fro mthe heat.
    • Serve hot or cold!

    The traditional way of eating pal payasm in kerala is with Puran poli!

    
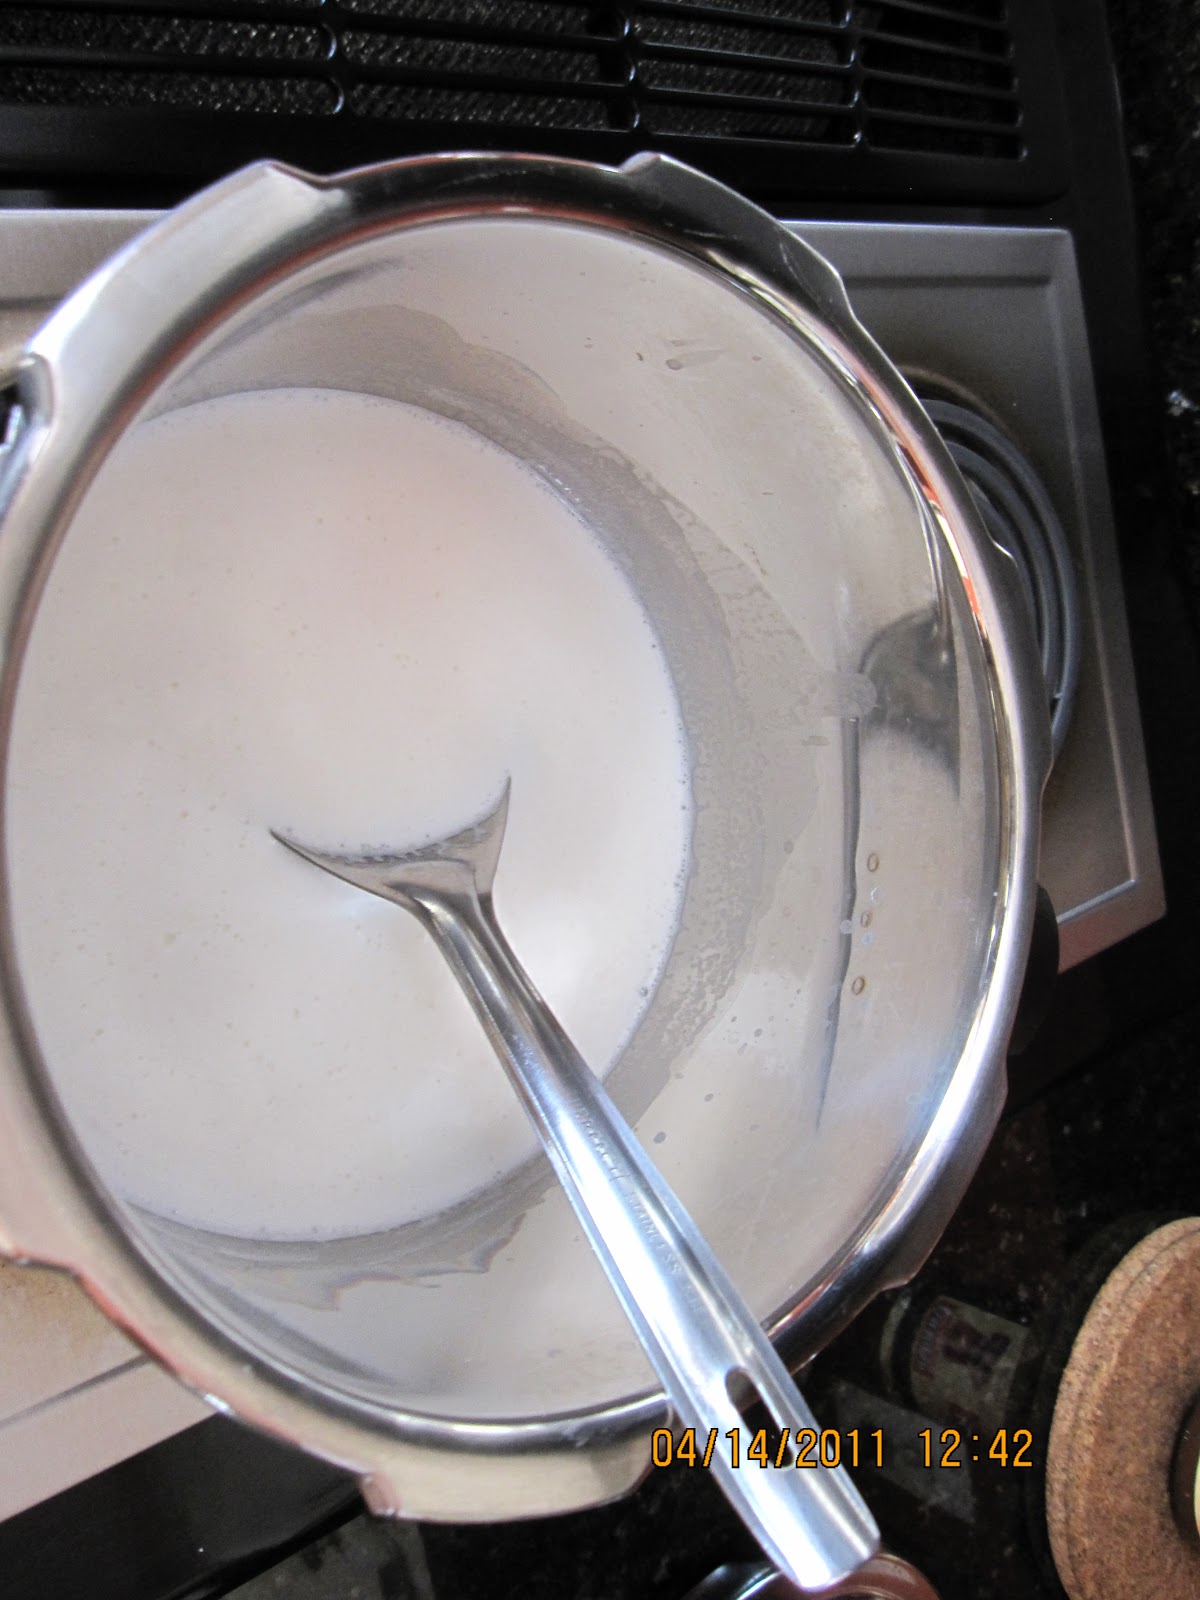
    Milk before reduction.
    
    Milk after reduction

    Payasam ready !