Wednesday, March 8, 2017

Ricotta Cheese Balls


I had half a tub of ricotta cheese left over in my refrigerator. I wanted to make something quick for the kids as a snack. I made these simple ricotta cheese balls  and both my kids and DH loved it. I made it very simple and you can add more vegetables or spices as per your taste.

Get Ready


  • 1/2 tub of full skin Ricotta cheese


  • 3-4 bread slices
  • 1 green chilli chopped fine
  • 1 tbsp of all purpose flour/ maida
  • Handfull of cilantro chopped fine
  • bread crumbs to coat
  •  salt to taste
  •  oil for deep frying
Go:

  • Rip the bread slices and run it in a blender/ mixi to make bread crumbs
  • In a bowl, take the ricotta cheese, add bread crumbs, green chilli, chopped cilantro and combine them all well. if you feel the mix is too moist, add some all purpose flour or besan.
  • make small balls with this mix and set aside


  • Roll these balls in bread crumbs and set aside
  • In a deep frying pan, add oil. Once oil is hot add the cheese balls and fry them till golden brown.
  • Serve hot with some tomato ketchup

Saturday, March 4, 2017

Sothi / Sodhi


Sodhi / sothi is a very popular dish from the region of Tirunelveli, Tamil Nadu. It is also pretty well known among the srilankan Tamils. It is very simple to make, extremely flavorful and goes well in idiyappam, dosa, rice, chapthai and puttu. There are many variations depending on the region and every household may have their own recipe of which vegetables to add etc. The first time I tasted Sothi was at a Srilankan Tamil friend's house in London in the late 90's. She served it with idiyappam and it was so yummy.

I found this receive from Chitra Murali's kitchen and tried it today. Here is the recipe!Fresh coconut milk would taste the better, but I did not want to do all the work and used the canned one. There is no oil used in this recipe. The list of ingredients may be long, but they are very simple,easily found in a pantry and it is one pot cooking.

Get Ready


  • 1 medium potato, peeled, washed and cut into cubes
  • 1 small red onion sliced
  • 1 tomato chopped
  • 3-4 green chili slit lengthwise ( adjust as per taste)
  • Few curry leaves torn
  • Lots of cilantro
  •  1 can of coconut milk ( I used Arroy D brand here in the US)
  • Cinnamon stick broken into 2 inch pieces x2
  • 1 tsp saunf / somber  crushed with a mortar & pestle
  • 1 tsp coriander powder / dhania powder
  • 1/4 tsp turmeric powder
  • 1-1/2 tsp of salt as per taste
  • juice from 1/4 th of lemon
Go

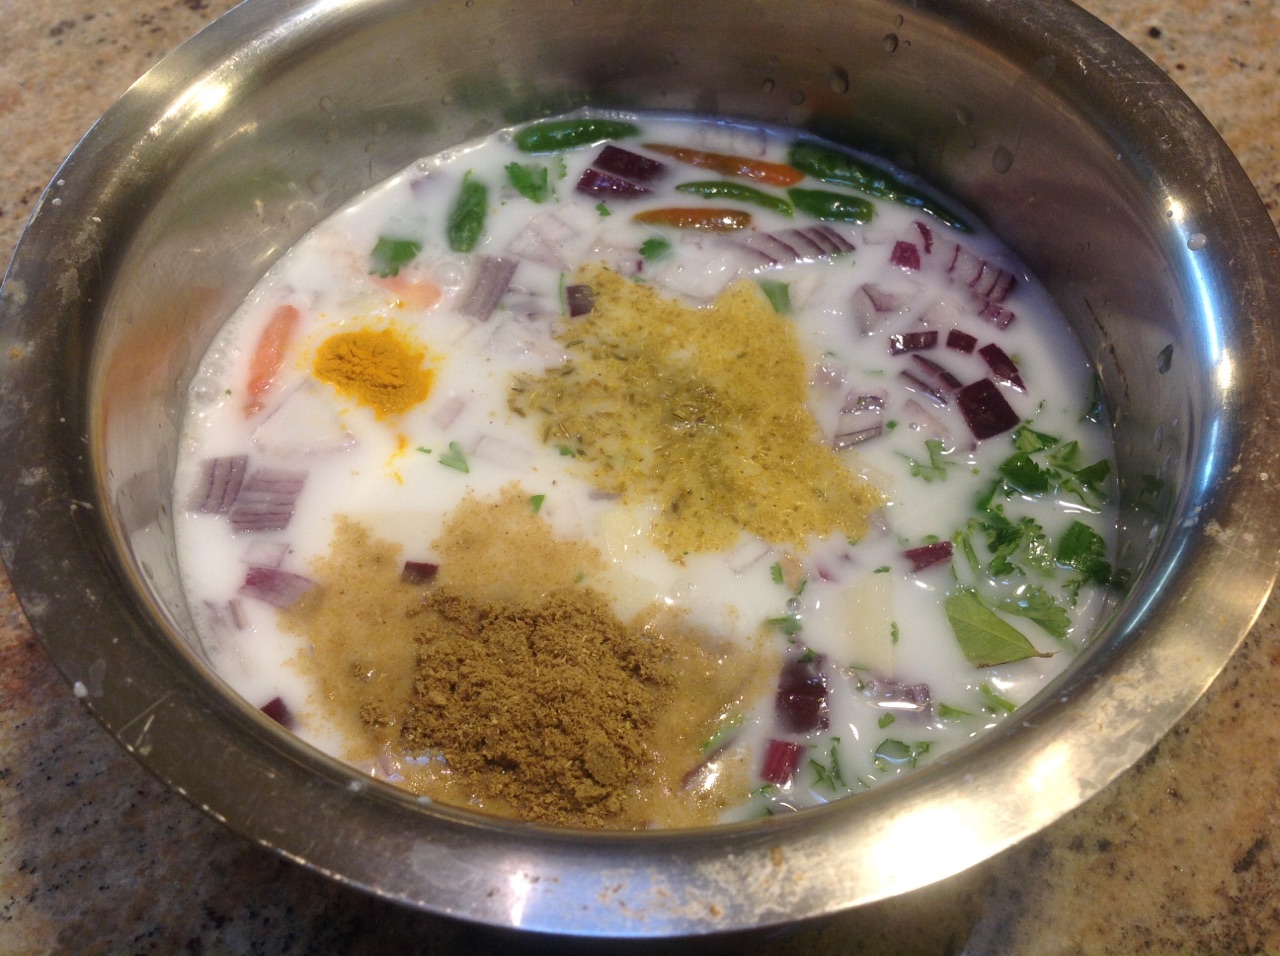
  • In a large vessel, add the cinnamon stick, onion ,chopped potato, tomatoes, green chilli, curry leaves, cilantro.

  • Add 1/4 cup of coconut milk and 1 cup of water. ( equivalent of 2nd and third milk if taken from a real coconut)
  • Add the crushed saunf, coriander powder, turmeric powder.
  • Keep the pan of medium flame and let the coconut milk water mixture boil till the potato is half done.
  • Add salt at this point as per taste and cook till the potatoes are done.

  • Now add another 1/4  to 1/2 cup of thick coconut milk, depending on what consistency you want the sothi to be.

  • Let the whole mix come just to a boil.
  • Turn the heat off and add the lemon juice.
  • Garnish with more cilantro and serve.

Tips:
adding the saunf and cinnamon gives an amazing fragrance to this curry.
You can make this thinner with more water and drink as a soup.

Tastes best with idiyappam. I served it with puttu for dinner today.

Sunday, February 19, 2017

Basundhi


Basundhi is a very popular desert in the regions of Gujarat and Maharashtra. In Tamilnadu, it is often called as basandhi in many restaurants. I have memories of eating basundhi after shopping in T Nagar, before boarding the electric train to chromepet. I have made it a few times, but never posted the recipe or blogged about it. I even won a prize when I improvised regular basundhi with a pumpkin basundhi for a local community event.

I have followed the recipe from Mallika Badrinath's " In suvai Inippugal"! Before the internet exploded with multiple recipe sites, video blogs etc I used mallika badrinath's cook books to make snacks and sweets. How many of you still use cook books?
Basundhi could be made with simple ingredients, just milk, sugar, cardamom powder and nuts. It takes some time, bit well worth it at the end.

Now, let us get to the recipe.

Get ready ( serves 2-3)


  • 0.5 gallon / 2 liter whole milk
  • 3-4 tbsp sugar or as per your taste
  • 1/4 tsp cardamom powder
  • 1-2 tbsp of chopped pistachios and cashews


Go


  • In a wide mouthed pan, add the milk and cook on medium high flame till it comes to a boil. Keep stirring so the milk does not scald at the bottom.


  • Once milk comes to a boil, reduce the flame and let it cook slowly. leave the wooden spoon in the middle, do not stir.
  • You will notice a layer of cream developing on the top milk like a dome.
  • With the wooden spoon gently push the cream/ "aadai" in tamil to the sides.


  • Keep doing this process till the milk has reduced to a third of it's initial volume


  • Add sugar and let it boil for 2-3 mins
  • If there are any cream sticking to the sides of the pan, scrape them in to the milk gently
  • Turn the heat off. Add cardamom powder and garnish with chopped nuts.

  • Refrigerate and enjoy any time. Once chilled, the basundhi will thicken. If very thick, add a little of evaporated milk before serving.

Tuesday, January 3, 2017

Rava kesari OPOS style


When I first stumbled upon the word, OPOS, I was like you all too thinking what in the world is that?
 OPOS stands for One Pot, One Shot a concept initiated and popularized by Mr Ramki.

 The whole concept is cook everything in one pot, a 2 liter pressure cooker with minimal oil. By cooking under pressure, you are locking up a lot of flavors and cooking fast. I searched online and found many people trying out different recipes in a pressure cooker and I was very fascinated by it.

They even have a special face book page for OPOS called UBF ( United By Food).

 So far I have tried making soup, beans poriyal, ghee, pasta, aviyal, chilli paneer in pressure cooker and will share recipes slowly. On the OPOS cooking site, they use a 2 Lt prestige cooker and an induction stove. I have been using my prestige pressure pan and gas stove and have been pleased with the results too.

So, here I am posting my first OPOS recipe for rava kesari. Anyone can make rava kesari is what you are thinking, right? That is why I chose this one as it should be easy and standard. I found a recipe Here and adjusted the sugar for my taste.

Get ready: ( serves 2-3) cooking time 10-15 mins
  • 1/2 cup rava
  • 1/4 cup ghee
  • cashews and raisins as per your taste
For Sugar syrup
  • 3/4 cup sugar
  • 1 & 1/4 cup water
  • A pinch of saffron food color
  • 1/2 tsp cardamom powder
Go:


  • In a pressure cooker bottom, add the water, sugar, saffron color, cardamom powder. Turn the heat on and stir and let it come to a boil.


  • Simultaneously, in another  pan add the ghee and roast the cashews and raisins till golden. Add the rava and roast till it is golden brown and aromatic.


  • If your sugar syrup is boiling and rava is not roasted, just reduce the flame and let the syrup simmer.
  • turn the heat off once rava is roasted and add the ghee, rava, cashew raisin mixture to the pressure cooker.


  • It will bubble up, don't panic. turn the pressure cooker off.
  • Give a quick stir and cover the pressure cooker with the weight on. Remember the heat is off.


Let the rava sit in the cooker for 20 mins. Control your temptation to open the pressure cooker in between.
After 20 mins, open the cooker and there you have your melt in your mouth rava kesari ready!


Friday, December 23, 2016

Masala / Spicy Chex Mix


The holiday season is here and I am getting tired of eating sweet things wherever I go. One of my associates brought a pack of chex mix, nuts for all the staff to much on. I tried that and was not impressed as it lacked any flavor or taste. I searched Google and found recipes for chex mix. Many of them called for Worcestershire sauce which had anchovies in them. Suddenly, it occurred to me why not make a desi version of chex mix. After all, we all grew up eating mixture, chivda etc and tried this masala chex mix. There is no actual recipe or measurements. The original recipe for chex mix calls for rice, corn and wheat chex. When I went shopping, I completely forgot to buy wheat chex.

Other things to add include, cheezits, cheerios, bugles etc.

Let us get to the mix now.

Get Ready:

  • 3 cups of rice chex
  • 3 cups of corn chex
  • 2 cups of pretzel sticks ( may use mini pretzel twists)
  • 1 cup dry roasted unsalted peanuts ( can use almonds, mixed nuts, pottukadalai/ dalia dal)
  • 3 tbsp butter
  • 2 tsp oil
  • Handful of curry leaves
  • Chili powder
  • Idli molagapodi
  • 1/4 tsp hing/ asafetida
  • Salt to taste
  • 1 tsp sugar


Go:

  • Take a big mixing bowl and add all the chex, pretzels, nuts
  • In a pan, melt the butter, add the curry leaves
  • Turn the heat off and add the spice powders except sugar
  • Pour the butter mixture, sugar on the chex mix and toss well till all the butter and spices are well coated.
  • Preheat over to 350 F
  • In a baking dish add the chex mix and bake for 10-15 mins.


Friday, December 9, 2016

Corn & Cheese Balls


These corn and cheese balls are very easy to make and will be absolutely loved by your kids. I made them less spicy and one can add more vegetables as per your taste. They are perfect for school lunch boxes or after school snack. of course, they taste much better when freshly deep fried. Serve them with ketchup or sweet and chili sauce.

You can get your kids involved in making them. My 7 yr old helped me make the initial balls, plop them into the all purpose flour/ maida paste. It was so much fun making with her and she ate the finished product so proudly that she made it.

Get ready ( makes 10 -12 balls of ping pong ball size)


  • 1 medium sized potato boiled, peeled and mashed
  • 1/2 cup of frozen corn
  • 1/2 cup Grated colby and montery jack cheese ( this is what I had at home)
  • 1/2 tsp crushed black pepper
  • 1 tsp besan
  • 1tsp rice flour besan and rice flour can be substituted with corn flour, I did not have corn flour)
  • salt to taste
  • chopped cilantro
  • Oil for deep frying


To make the paste:


  • 2 tbsp maida/ all purpose flour
  • water
  • Bread crumbs , no measurement for this
Go

Take half of the corn and pulse it in a blender.
In a bowl add the mashed potato, whole corn and pulsed corn, cilantro, cheese, salt, pepper etc and combine everything.
Make small balls as per your liking, rubbing some oil between your palms.
Set aside.
In a bowl add the all purpose flour, add water little by little and mix to form a thick paste. Set aside
Take potato corn balls, dip them in the all puropse flour batter. take them out and roll them in bread crumbs till all sides are well coated.
Do this with all the balls and keep them refrigerated till you are ready to fry. Just refrigerating them for a little while helps the balls to hold together while deep frying.


In a pan add enough oil for deep frying the balls.
Once oil is hot, add the balls and deep fry them till they are golden brown on all sides.

Serve hot with ketchup, chutney. You can add grated carrots, finely diced bell peppers for some pop of color and crunch.

Wednesday, November 23, 2016

Elai Adai


Elai adai is a traditional kerala dish made on special occasions. Rice batter is stuffed with sweet filling of coconut, jaggery, jack fruit, folded in banana leaf and steamed to perfection.  Some people also call it "Valsan". I did not have fresh jack fruit and hence used a table spoon of chakka varatti which I got from India. You can omit this jack fruit and just do with coconut alone. I added some cashews just to give a nice texture and crunch to the poornam. You can see the display of my sweet at the contest, as I did not have time to take close up pictures.

I recently participated in a desert contest where the ingredient that need to be used was rice. I made elai adai and it came out very well and liked by many. I got this recipe from my chithi/ aunt and would like to thank her for encouraging me to do this. One can also use savory filling instead of he sweet one. I made one with sauted onions, corn and zucchini and steamed in banana leaf and it was yummy too.

Get Ready

To make  the rice batter


  • 1/2 cup raw rice ( ponni raw rice)
  • 1/2 cup parboiled rice ( puzhungal arisi)


Soak the rice in water for at least 3-4 hrs. drain the water and grind them into a very smooth batter without much water. set aside. The batter should be  like the consistency of pancake / idli batter.
Take a tbsp of the batter and add 3-4 tbsp of water in a vessel. Cook on a low flame stirring till the thin rice batter water mix becomes a thick paste or " kanji" like. See the consistency of the batter in the picture.
Let it cool completely and add it to the rice batter. whisk it well without any lumps and set aside. This step will help your outer covering of the adai stay soft for a long time. 

To make the poornam /stuffing


  • 1 cup grated jaggery/ vellam
  • 1/4 cup water
  • 1 cup freshly grated coconut
  • 1 tsp cardamom powder
  • 2 tbsp  whole cashews, broken into small bite size pieces, roasted golden in ghee
  • 1 tsp ghee
In a pan add the jaggery and add water just enough to soak the jaggery.


let the jaggery melt, strain the mixture to remove any dirt.
Return the jaggery water mixture to the stove and let it come to a frothing boil and thick.


Add a drop of the frothing " paagu" to a small bowl of water, you should be able to make a small ball, which will be like the consistency of slime.


Add the coconut, cardamom, cashew pieces and ghee and cook till the stuffing is sticky but also leaves the side of the pan. Turn the heat off & set aside. you can add  1tbsp chakka varatti at this point and mix. This step is optional. Now the poornam is ready.

To make the adai

Banana leaves  rectangular pieces at least 20- 25 cm long. If the leaves are older, it is better to fold them. if you have fresh leaves, just show them on the flame of your gas stove. This is called " elaya vattaradhu". This step will make the leaves more pliable to fold.
Add a small ladle of the rice batter at the center of the banana leaf. Spread it thinly like a small dosa. This is called " maavu ezhudharadhu".


Add a spoon of the  poornam to one side of the rice batter.


 Fold the banana leaf in half. Fold the all sides and flip and keep them aside with the folded side down. 


Arrange these in a idli plate and steam in  the cooker (without weight) for 20 mins. Once steamed, the banana leaf will change color. You can see how I had folded the leaf. By this, the poornam get smeared all over the rice flour.


Once cool, open the leaf packet and enjoy the elai adai. It will taste so good with the smell of banana leaf, jaggery, coconut etc.

Here is a picture of he savory elai adai, opened.


Wednesday, November 16, 2016

Cranberry Avakka/ Avakkaya


A bag of bright red/ burgundy cranberries always beckon me at the supermarket aisles. The sour, tart flavor makes me think " Hmm.. I can do something interesting with this cute little thing than make a relish!" During my recent shopping, this thought made me pick a bag of cranberries.

 My friend gave me a bottle of cranberry pickle last year. She made the pickle in avakka style I love mango avakka and could not wait to try the cranberry avakka with some curd rice. It was delectable and I instantly loved it. I have wanted to make some by myself and the recent availability of fresh cranberries in the market encouraged me to do so. I asked my friend for the recipe and she was nice to share it with me. I made it last week and it came out pretty good. So, here is the recipe for cranberry avakka.

Avakka is a delicacy from the state of Andhra. Ava means mustard seeds and kai means mangai or raw mango.

The rule of thumb for the spice mixture for avakkaya is 8 measure of cranberry, 1 measure of salt, 1 measure of red chilli powder, 1/2 measure of mustard seed powder and 1 measure of oil. I used a large ladle and measured everything with that. You can use any measuring cup you you want. Adjust salt and red chilli powder as per taste.

There is no cooking involved except for roasting the vendhayam/ fenugreek. The ground cranberries give a little more " vizhudhu" for the pickle as they do not ooze as much liquid as mangoes. This is one of the easiest pickles to make and it tastes finger licking good.


Get ready


  • 1 , 12 oz bag of fresh cranberries ( 1.5 cups)
  • Salt
  • Mustard seeds, powdered ( without roasting)
  • Red chilli powder
  • 1 tsp Fenugreek seeds, roasted and powdered
  • oil ( I used canola oil, you can use gingelly or vegetable oil too)


Go


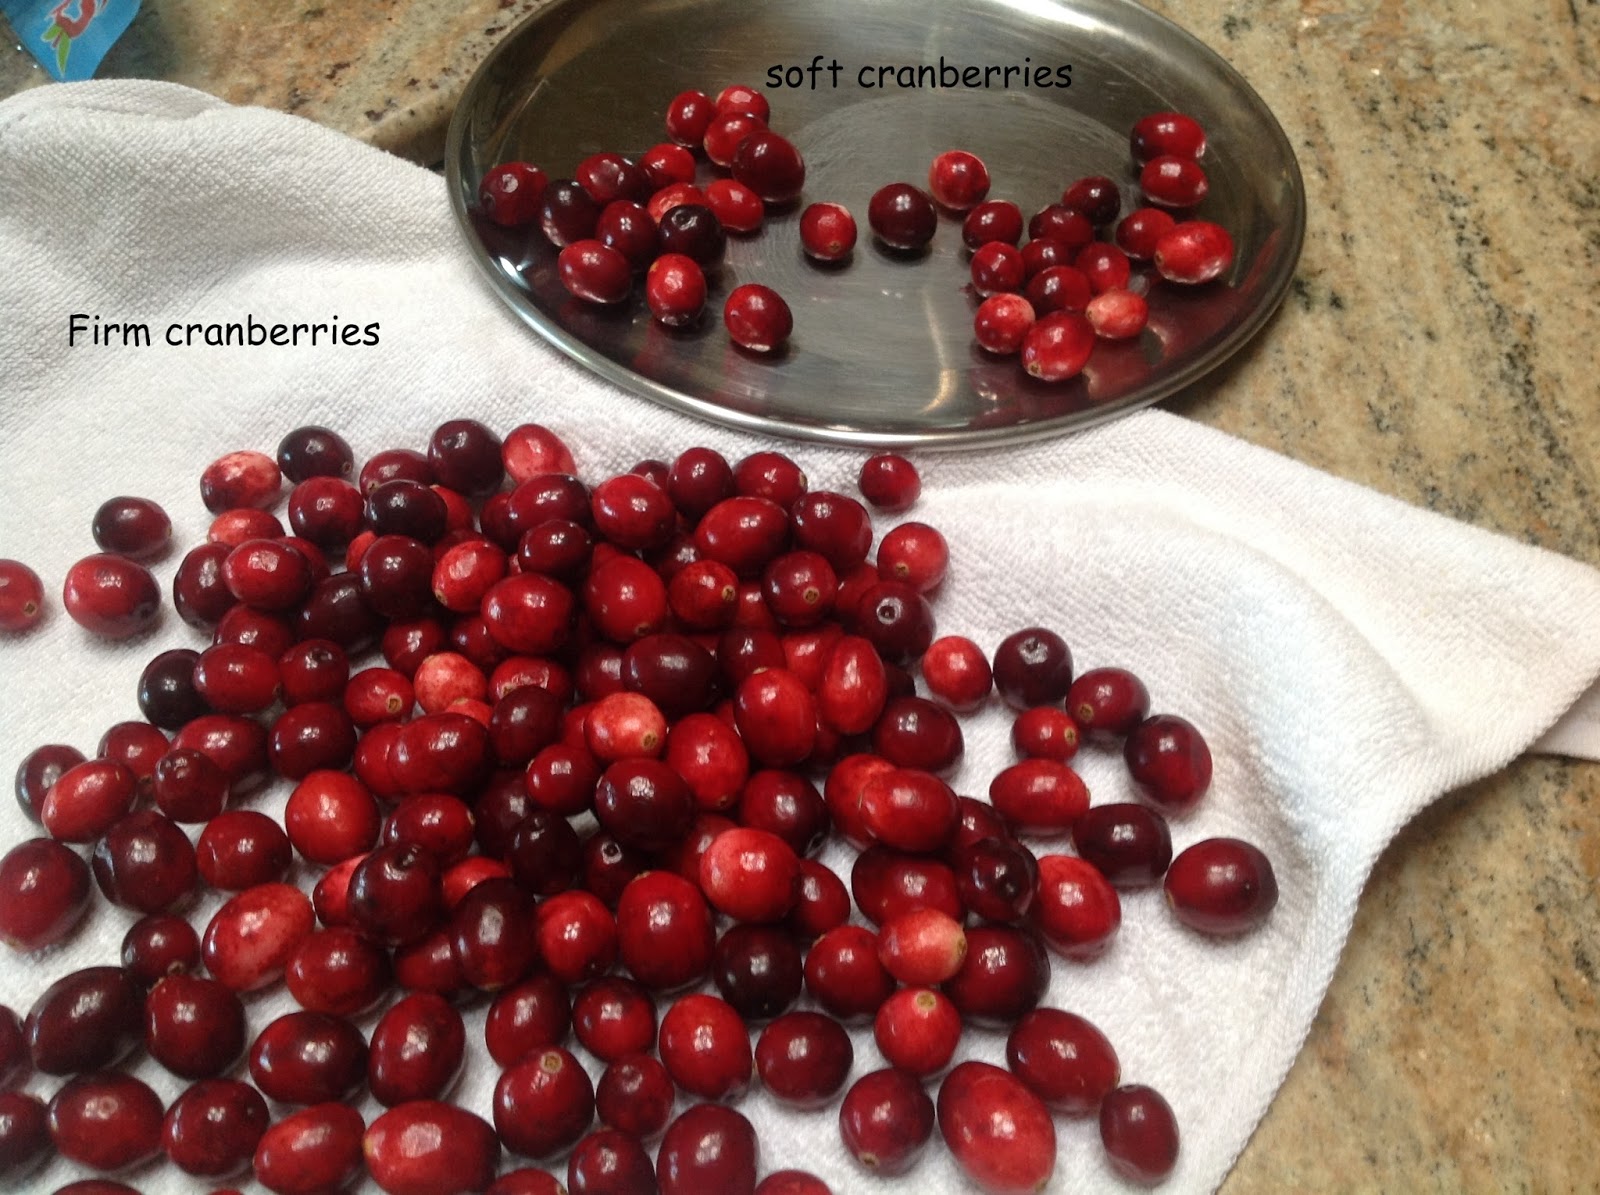
  • Wash the cranberries and let it air dry completely on a towel. You do not want any moisture. It may take 2-4 hrs for it to dry out completely.
  • Pick out those cranberries which are soft and squishy and set aside . You want firm cranberries for the pickle.

  • Cut the firm berries in half or quarter depending on the size of your berries.


  • Take the soft cranberries and pulse them in a blender for a few seconds.
  • In a bowl add the chopped cranberries, pulsed berries, salt, red chilli powder, mustard seeds powder, roasted fenugreek powder, oil and mix well.

  • The oil should be  floating on top of the berries and that is the adequate amount of oil one needs for the pickle.

  • Adjust salt per taste and transfer it to a clean air tight bottle.
Enjoy this avakka with rice, dal, molagootal and  yogurt.

If you like garlic, you can a few cloves and pulse it with the soft cranberries. It takes the taste to another yummy level.


Friday, October 21, 2016

Bell pepper rice / Capsicum Rice


Recently, I made this bell pepper rice for navarathri pooja get together. It is very simple and easy to put together. My daughter who is not a big fan of bell pepper ate this rice without much complaints.let us go straight to the recipe.

Get ready


  • 1 green bell pepper / capsicum washed and diced small
  • 2-3 table spoon oil
  • Salt to taste
  • 1/4 tsp tamarind paste ( optional)
  • 1/2 tsp mustard seeds/ kadugu
  • 1/2 tsp urad dal
  • A few sprigs of curry leaves
  •  1 cup of rice , cooked separately and cooled


To roast & grind


  • 1 table spoon dhania / coriander seeds
  • 1 table spoon Chana dal / kadalaparuppu
  • 2 dried red chili
  • 1/2 tsp cumin seeds / jeera
  • 1/2 tsp sesame seeds
  •  2 cloves
  • 1-2 table spoon dried coconut
  • 1/4 tsp asafetida


Go


  • Cook rice, spread it on a plate to cool and set aside.
  • In a pan add little oil and fry all the ingredients except dried coconut & asafetida.
  • Once cool, grind them into a coarse powder. To this powder add the coconut and asafetida mix and set aside.
  • In a pan, add the oil. Once hot add the mustard seeds and let them splutter. Add the urad dal and fry till golden. Add the curry leaves and sautĆ© for few seconds.
  • Add the diced bell pepper , salt mix and cook till the peppers are a little soft but still a little crunch.
  • Add tamarind if using, adjust salt as per your taste.
  • Once the peppers are done, add the ground powder to the peppers and cook on aloe flame till all the flavors and masala gets incorporated in the pepper.
  • Turn the heat off.
  • In a wide mouthed bowl, take the rice add 1 table spoon of oil to the rice.
  • Add the cooked bell pepper masala and toss them with the rice till every rice is coated with the masala. Mix gently so you don't make the rice mushy .
  • Garnish with cilantro if you like it.
  • Serve with raita, applam, chips and enjoy!


Friday, September 30, 2016

Oven baked Karela/ Oven baked Bitter Melon


I have posted couple of karela / pagakka recipes Stuffed karela, karela fry

This recipe was shared by my friend, and I have tried it couple of times and comes out very tasty. I have used 6 small karelas. There is no recipe as such, the addition of all masala powders are per your taste. Me and my husband really enjoyed this and.


Get ready:


  • 5-6 karelas washed


For the marinade:


  • 1/4 tsp turmeric powder
  • 1 -2 tsp red chili powder
  • 1-2 tsp coriander powder
  • 1 tsp cumin powder
  • 1/4 tsp amchur powder (optional)
  • Juice from 1/2 lime
  • Salt to taste
  • 1 tbsp olive oil


Go


  • Preheat oven to 375 degree F. Line a baking sheet with foil and brush a table spoon of oil. Set this aside.

  • Scrape / peel the outer ridges of the karela. You can omit this step if you don't care for a little more bitterness. You can either discard the scrapings or use it in the marinade as well.
  • Cut the karelas in half and scoop out the seeds using a spoon.

  • Cut the karelas in thin circles.

  • In a bowl add the circular slices of karela, all the ingredients  under marinade and toss them all well with clean hands. You want the marinade to fully coat the karelas.
  • Adjust salt and spices as per taste.

  • Cover this and let it marinate on the counter for 20-30 mins
  • Spread the karelas on the lined baking sheet and bake them for 20-30 mins or until crisp.
  • Remove from the oven and serve. If you want crispier, let the karelas sit in the oven for few more minutes after you turn the oven off.


Tastes great with rice, by itself as a munching snack and with yogurt.

Try this and tell me if you like it.

Monday, August 22, 2016

Peanut Chaat / Peanut Salad


I made this quick and easy salad when my best friend came over for lunch. It is full of protein and very tasty too. Me and my friend had planned some physical activity that day and this power packed salad did help us to keep going! But, this definitely is not the thing if you have peanut allergies.

A perfect snack or a meal by itself for you all to enjoy! One can add other vegetables of your choice like cucumbers, bell peppers, roasted corn, cubed and boiled potatoes. You can also add some paneer and crumbled feta if you are a cheese lover.

Get Ready


  • 1 cup raw peanuts
  • 1/2 mango peeled & diced
  • 2 carrots finely chopped
  • 3 green onions chopped
  • 1/4 tsp ginger grated
  • 1 tomato, remove pulp and chopped
  • 2 jalapeƱos thinly sliced ( keep seeds if you want some heat)
  • 1/2 tsp chaat masala
  • Salt to taste
  • Lots of chopped cilantro
  • Lemon/ lime wedges to serve
  • Thin sev for garnishing.


Go


  • Soak the peanuts in water for 1 hr and pressure cook with little salt for 3-4 whistles. Once the pressure cooker cools, drain the water from the peanuts and set aside.
  • Prep all your veggies. Chop them in the same size as your peanuts .
  • In a bowl, add the peanuts, chopped vegetables, salt, chaat masala and toss them well.
  • Adjust salt and chaat masala as per your taste.
  • Cover and refrigerate .
  • Before serving, squeeze a little lime juice from a wedge and garnish with sev, mint chutney or serve just like that and enjoy!

Wednesday, August 3, 2016

Thayir Vada / Dahi vada


Thayir vadai is a classic dish of the south! I made them recently for a get together and the vadas were absolutely melt in your mouth type. It is very easy and quick to make. Try them and enjoy with your family!


Get Ready


  • 1 cup whole urad dal, washed and soaked in water for 4 hrs
  • 1 tbsp of raw rice ( soak it with the urad dal)
  • Oil to deep fry
  • A few sprigs of curry leaves
  • A bowl warm warm 

For the thayir/ dahi


  • 1-2 cups of plain yogurt ( preferably the ones that is not sour)
  • 2 tbsp fresh grated coconut or frozen grated coconut
  • 1 small piece of ginger
  • 3/4 jalpeno chopped
  • salt to taste
  • Plenty of cilantro finely chopped
  •  finely grated carrots 1/4 cup
  • Nylon sev/ Bhoondhi ( store bought)


GO


  • In a blender pulse the coconut, green chilli, and ginger.
  • Add this to the yogurt with required amount of salt and whisk them well. Keep it aside.If it is too thick add a little water.

  • In a wet grinder add very little water at a time and grind the urad dal till nice and fluffy. use ice cold water while grinding the urad dal. using ice cold water is more useful if you are using a regular blender.
  • Add some asafetida, few torn curry leaves and required salt to the urad dal batter. heat oul and make them into small vadas. if you are having trouble mkaing holes in the vada, add them just like round balls and deep fry them till they are golden. Fry all the vadas and set aside.
  • Add the fried vadas to a bowl of water. Let them sit for a 5-6 secsonds. With the back of 2 spoons, squeeze the water from the vadas and arrange them in the bowl you are going to serve. use a wide pan.
  • Once all the vadas are arranged, pour the yogurt that you have mixed on top of the vadas.
  • Garnish with cilantro, carrot etc and keep refrigerated.
  • Before serving add the sev/ bhoondhi.
Let me know if you try it and like it!